In my earlier blog on Microsoft Outlook I had listed out a few of the tips and tricks that might have helped you. In this blog, I will share a few advanced Microsoft Outlook tips and tricks that will undoubtedly boost your productivity.
Colour Coding on Inbox, Subfolders & Calendar
This feature would be really helpful to identify the important and the not so important emails with a single glance. One way is to set filters to separate the emails into those addressed only to you, those addressed to you and others, and those in which you are copied.
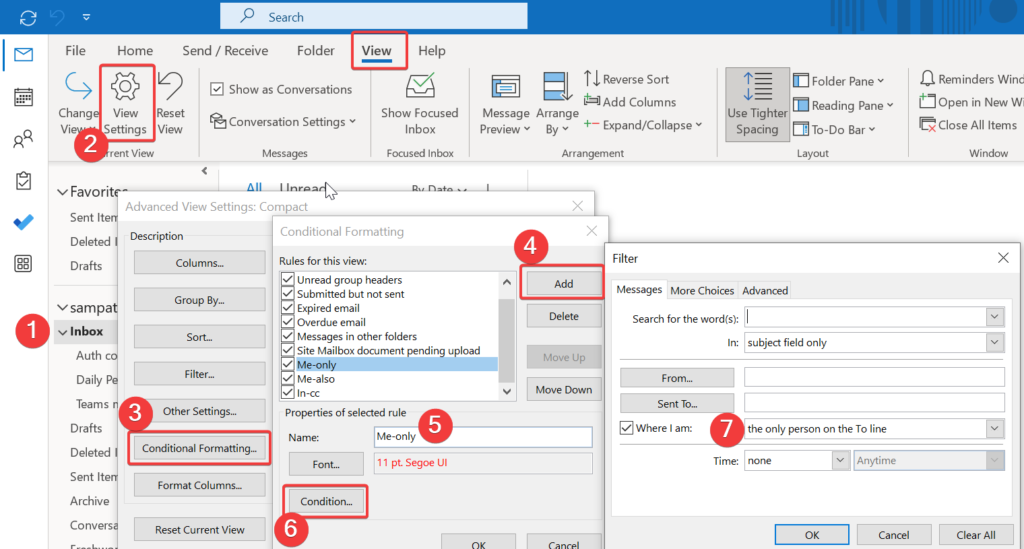
To apply a colour code rule to the emails in your inbox, go to View > View Settings > Conditional Formatting and make the necessary changes. On the Conditional Formatting pop up window, create a new rule with appropriate name, font and condition.
The above setting will apply the rule only to the inbox mails. To apply the rule to subfolders, go to View > Change View > Apply Current View to Other Mail Folders and select the required folders.
In the same way as colour coding the inbox, you can colour code the calendar as well. The colour code setting is done in the same way as for mails. On the Calendar window, navigate to View > View Settings > Conditional Formatting. On the Conditional Formatting pop up window, create a new rule with appropriate name, color and condition.

Loop Components in Emails
Loop components are portable, editable pieces of content that stay in sync across all the places they are shared. You can embed them in a Outlook item just as you can also do in Teams chats. Loop components enable you to capture everyone’s ideas, track a group’s action items, or organise questions and answers without having to switch back and forth between Outlook and other apps.
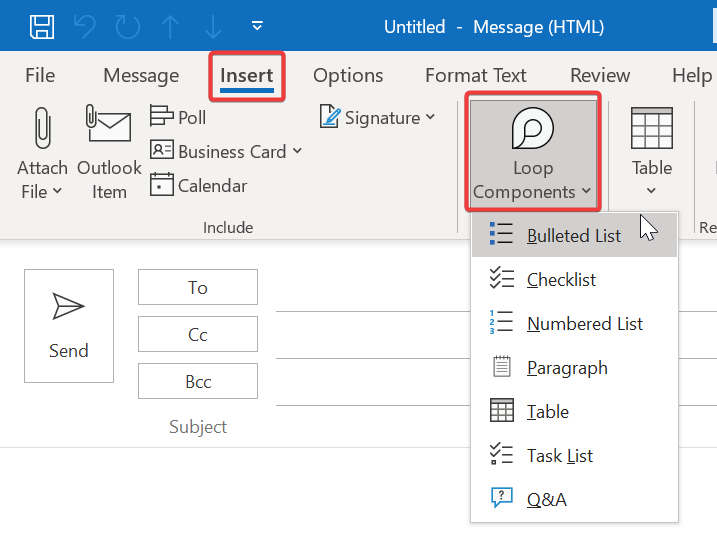
To insert a loop component into a message, go to Insert > Loop Components and then choose the component from the drop down list. After the Loop component appears in the body of the email, edit it as needed and then send it to start collaborating. If you’re not sure which loop component to use, simply type “/” in the Loop component and select an option from the menu. Once the email is sent, recipients can start collaborating in the Loop component.
Delay the Delivery of Emails
There are situations wherein sending an email before you’re ready can mean a bit of embarrassment — maybe a typo slipped through or you emailed the wrong person. Other times, though, the repercussions of sending an email in haste can be more significant. An email sent when emotions are running high, for example, can create a world of problems for the sender. This feature is also useful if you don’t want to bother an email recipient who lives in a different time zone by sending an email at odd hours.
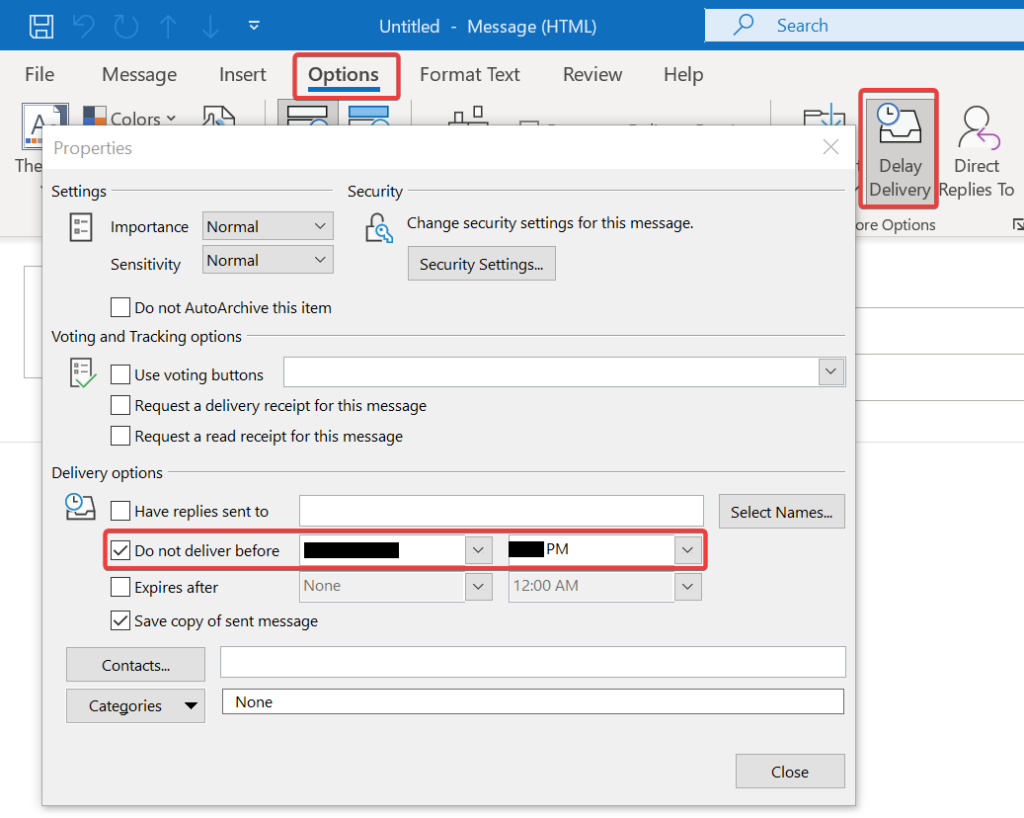
Once you click on the “New Email” button, a new window opens wherein you can compose your email. After you’ve finished writing your email, go to Options > Delay Delivery and set the date and time for the “Do Not Deliver Before” item under the delivery options. Now you are ready to send the mail with a delay.
However, keep in mind that if you are using the desktop version of Outlook, you must keep it running in order to send emails with a delay. But some of us want to delay the send without switching on our PC. This is possible with the Web version of outlook 365. When you click on the “New mail” button, a new window opens wherein you can draft your email. Once your draft is finalised, click the drop down icon next to the send button and select the Schedule send option to defer your emails.
You can defer all your emails by setting up a rule under the Rules > Manage Rules & Alerts option.
ToDo Tasks & Flagged messages
To create tasks from email messages in Outlook, simply drag the email into the tasks sidebar and set a completion date. This same task will appear in the MS ToDo list as well. Create a new task in MS ToDo by selecting “Add a task” and it will automatically appear in the Outlook tasks as well.
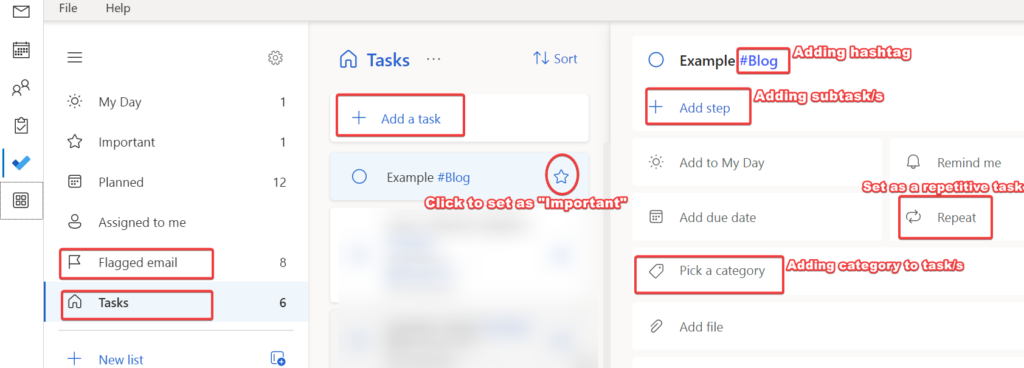
In the Todo app you can mark the task as important and set subtasks to each task if needed . In case of repetitive tasks there is an option to select the repeat option. You can categorize tasks using either the colour code or the hash tag option for quick access.
If you want to follow-up with a message later, just flagging the message on Outlook is fine. In MS Todo you can see both the tasks and flagged email under different topics.
Create a Distribution List
This is a great feature to make use of when you frequently mail a group of contacts. The “distribution list” for a project team, a committee, or even a group of friends can be used to send emails to a group of people without having to type their email address one by one.
The distribution list can be set up as follows:
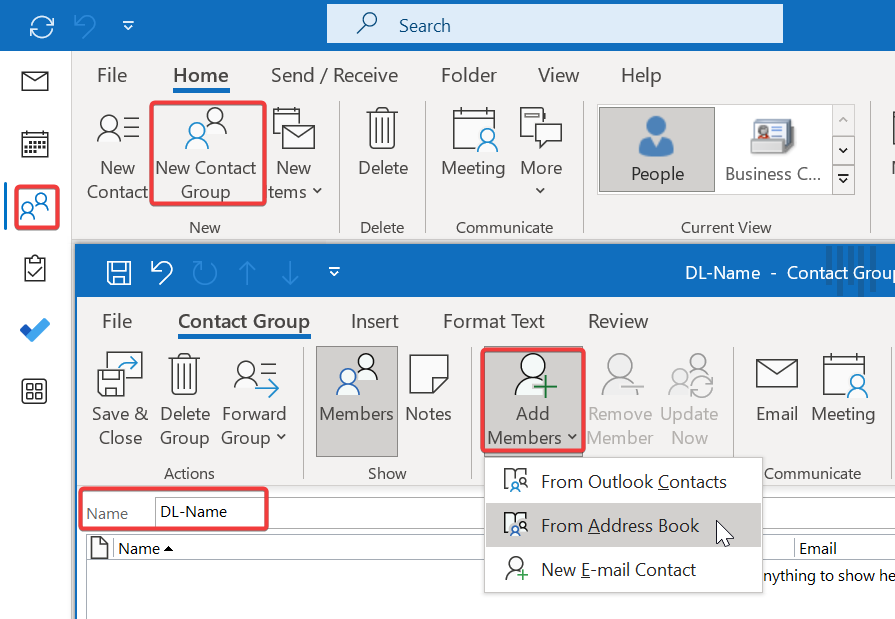
Click “People” or the people icon on the left sidebar. Click on the “New Contact Group” button just to the right of the “New Contact” button at the top of the window. A “New Contact Group” pop up appears in which you can input the distribution list name at the top, where it says “Name”. You can add contacts to this new list by clicking on the button Add Members > From Outlook Contacts/Address Book/Email Contacts. Once the contacts are added click on the “Save & Close” button at the top left of the “Contact Group” window.
Now you are ready to send emails by just using the distribution list name “DL-Name” instead of individual email addresses.
Further Reading :


Leave a Reply