
To visualize routine activities, gather all tasks on a Kanban board, including scheduled ones through automation rules, whether they belong to a Jira software project or a Jira SM service project. You can also display service requests from your Jira SM service project on the Kanban board and show selective alerts from the Opsgenie/Jira SM Teams page as well. In this blog “Integrating Jira SM Alerts into Kanban Workflow” you will learn the step-by-step procedure on making an alert to appear on Kanban board.
Currently, Opsgenie features are available natively in Jira Service Management. Thus, making it possible to access your operations work in the same place as the rest of your work is. Your Jira SM Teams page is the central hub for all operations work and configurations. You can add Jira SM members to responder teams here.
Using the Go to operations option you can configure settings w.r.t on-call schedules, integration, routing rules, and escalation policies at the team level. Hence, handling each alert differently based on its source and payload. You need to set up the integrations to get the alerts to come in. Jira SM integrates with various monitoring, logging, ticketing and chat tools.
Sync is a new feature that provides control over keeping alerts, issues, and requests synchronized. Here, you can control how and when Jira software issues and Jira SM service requests create alerts. Additionally, you can create workflows to define the conditions that trigger the generation of issues and requests in response to an alert.
Integration
You need to set up the integrations to get the alerts to come in. In our example, we will consider integrating with an application that can send emails which will trigger alert generation on Jira SM. Navigate to the concerned responder team (Test) below from Teams > Test.
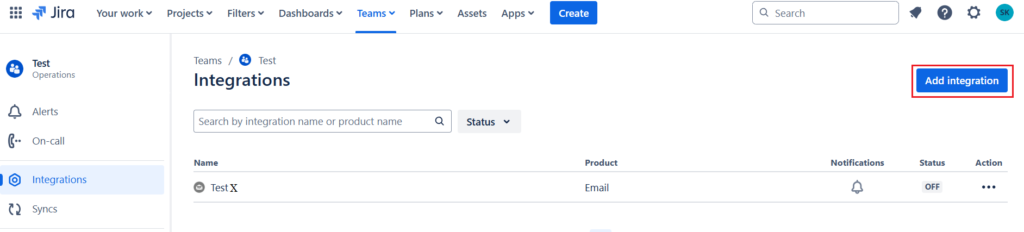
Since we need to add a new integration, let us click on the option “Add integration” as shown in the above picture. This will take us to the following screen.
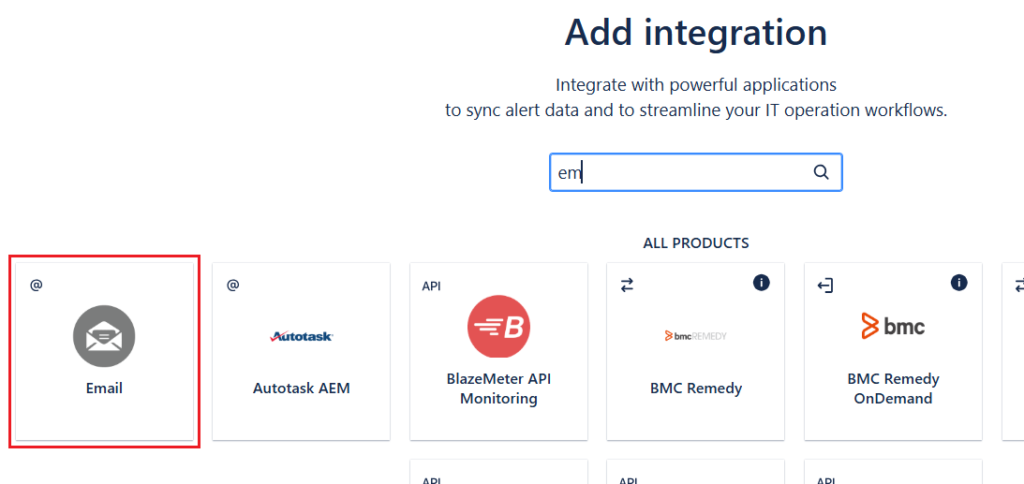
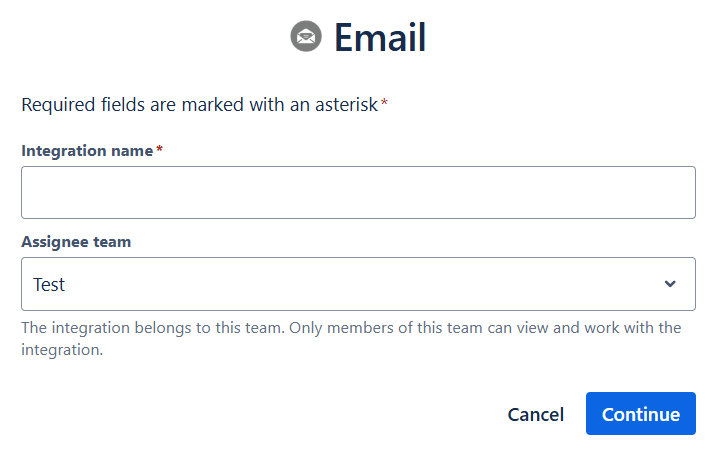
Select the application that you want to integrate to,i.e, Email application in our scenario. Clicking on Email icon above will take us to the following screen. Here, you can select a team under Assignee team section using the drop-down option. Since we have only the Test responder team now, we will select that and that specific team will receive alerts from this integration. Provide an appropriate integration name (TestX) as well.
Once the Continue button is pressed, the following screen will appear. Find the email address here that can be used for integration. Mailing to this email id will generate alerts on Jira SM.
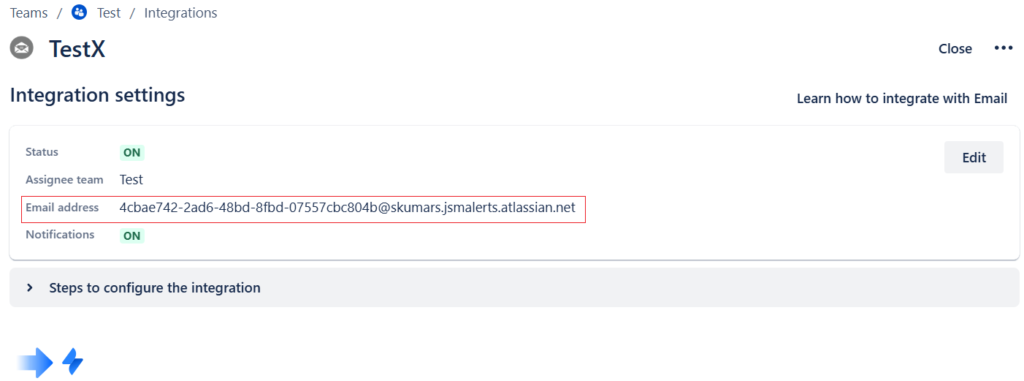
The rules that you create for the integration as explained in the next section will work only if you turn on the integration. The status is turned ON in the above picture which indicates that the integration is ON. Jira SM creates an alert for each email sent to the specified email address as above. By default, email integration uses email subject as the alert message, and email body is put into the alert description field.
Since our final goal is to create a task on the Kanban board for the alert created, our next action would be to create a rule for the same under Syncs.
Syncs
Navigate to the Syncs section that is present just below the Integrations section. Click on the Create sync button at the top right to start creating rule(s) for the integration.

Select Create and update issues against alerts created by integrations or other syncs and select Add rule to set up a rule that creates an issue based on alert events caused by integration. Here, you can specify the conditions such that the status of the work event/issue created will reflect all the changes to the alert in Jira SM. This may include updating the comments in the work event and closing the work event based on the updation done to the alert(s).
However, the upper section, i.e., Rules for creating and processing alerts, can be used to create rules such that the alerts reflect the changes done to the Jira Software ticket. This may include updating the comments in the alert and closing the alert based on the updation done to the work event(s).
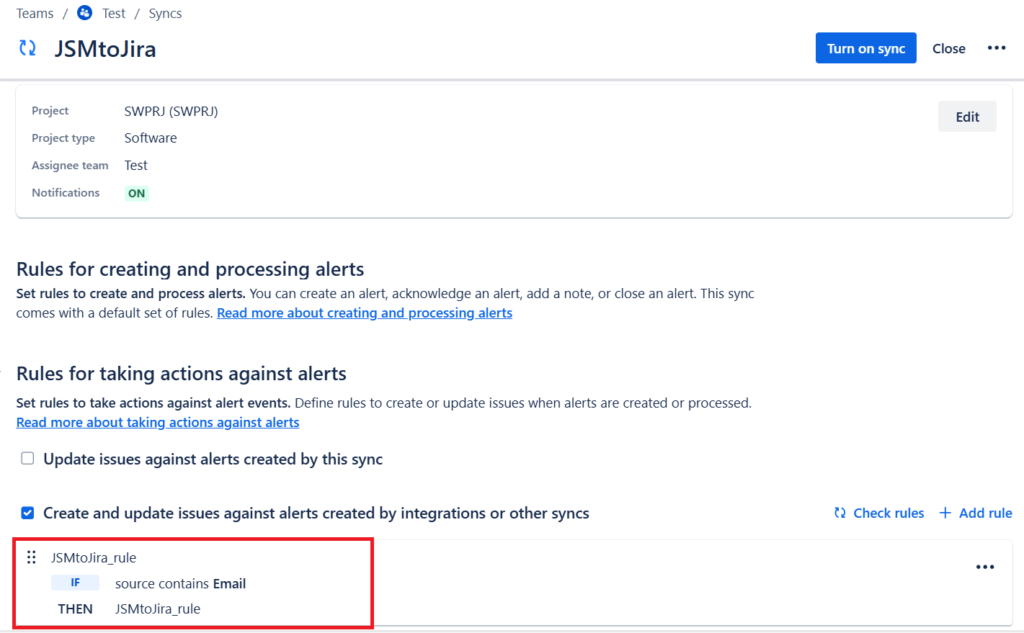
For the lower section ,i.e, the Rules for taking action against alerts section, the filter condition is set such that, if the Source section in the alert contains an entry of Email, then create a new Issue type of Task on Jira Software.

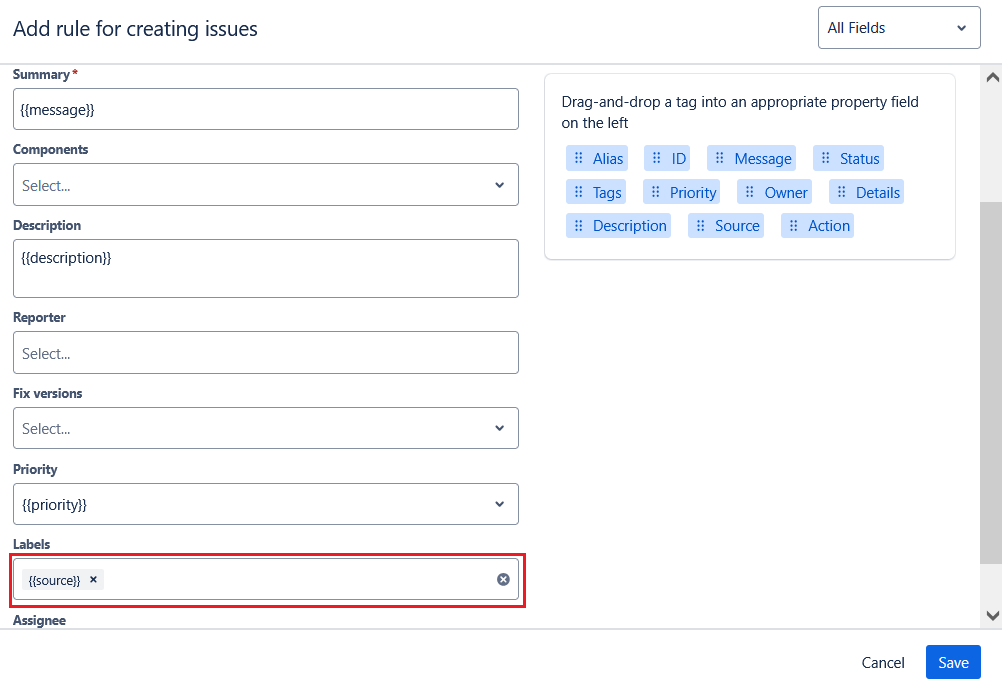
Under Default and mandatory fields customized, further settings can be done. The labels section is set to the source field in the alert which can be used for further filtering on Jira Software if needed.
Click on Save button and Turn on sync button to activate the rule.
Verification
Once you turn on the integrations and syncs, the next step would be test the whole setup. Send a mail to the email id specified earlier under integrations.
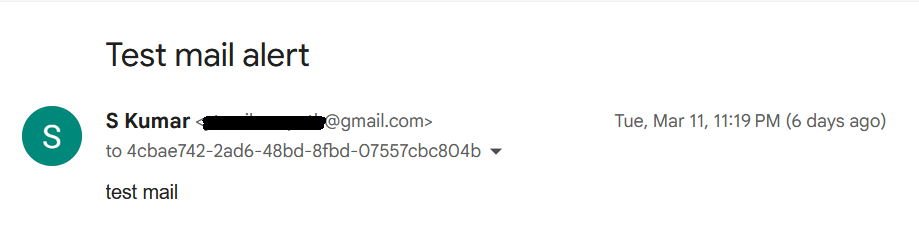
The subject of the mail is “Test mail alert” and the content of the mail is “test mail”. Alert(s) will appear under Teams>Alerts as follows. The summary/alert message as shown below is the subject of the mail as mentioned earlier.
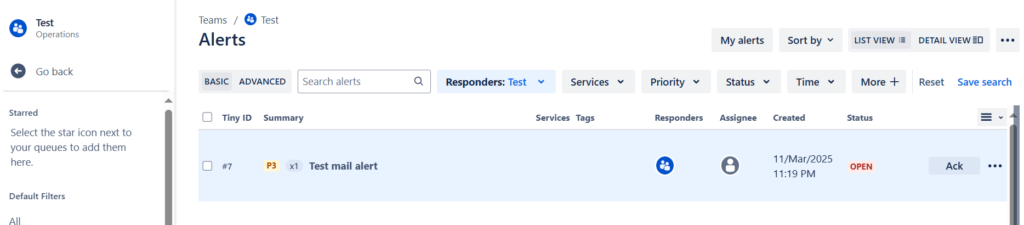
The description of the alert contains the body of the mail as shown below.
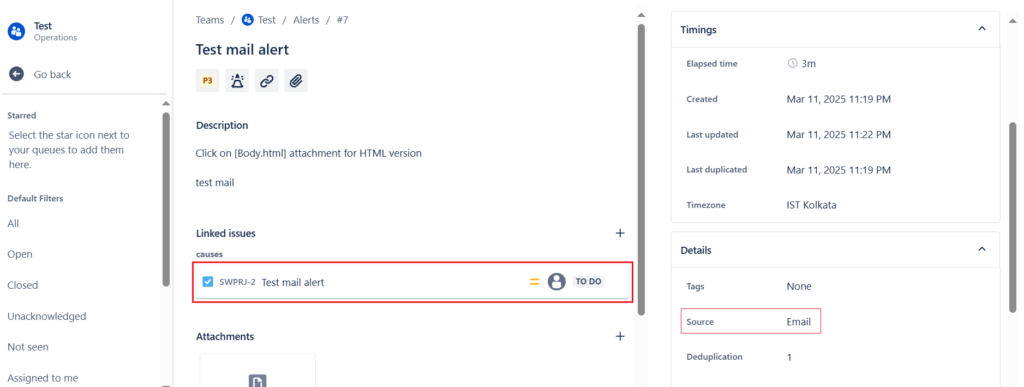
We can also see that the Jira software issue is linked to the alert ticket. If you navigate to the software project that has only the kanban board, it will display all the issues created for that project. Moving the kanban board ticket to In Progress status will automatically change the alert ticket status from Open to acknowledged, and moving the ticket to Done on the kanban board will change the alert ticket status to Closed. This is possible, provided you have made the appropriate sync settings under Rules for creating and processing alerts.
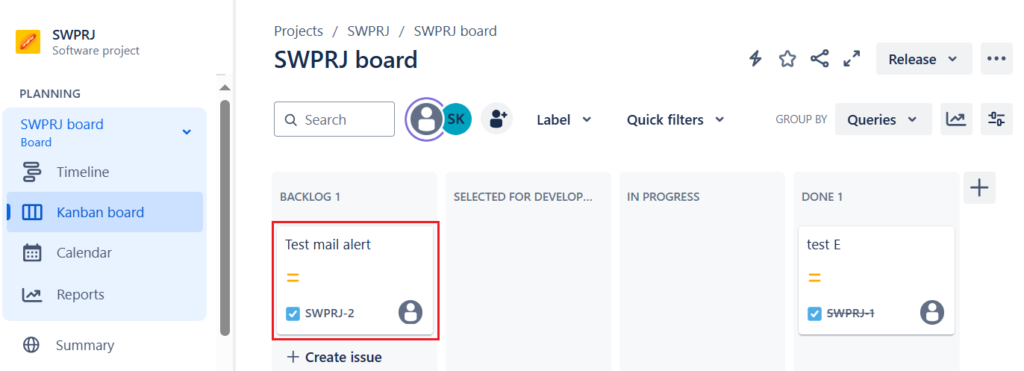
Suppose we have one Kanban board and one Scrum board in the software project SWPRJ. We would need further filtering to display the appropriate task/story on either the Kanban or Scrum board. To display on the Kanban board, you need to filter the task/story under Configure board>General>Board filter>Edit filter query using the project name, labels etc. You can also make use of swimlanes to group different work items together.
Further Reference:


Leave a Reply