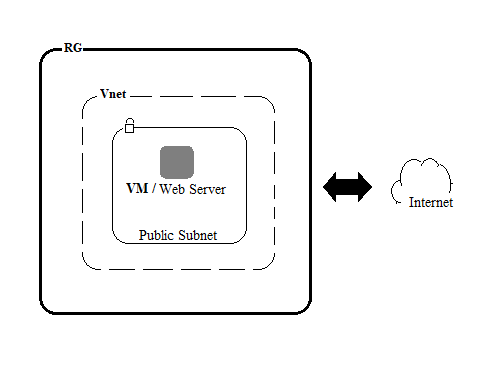
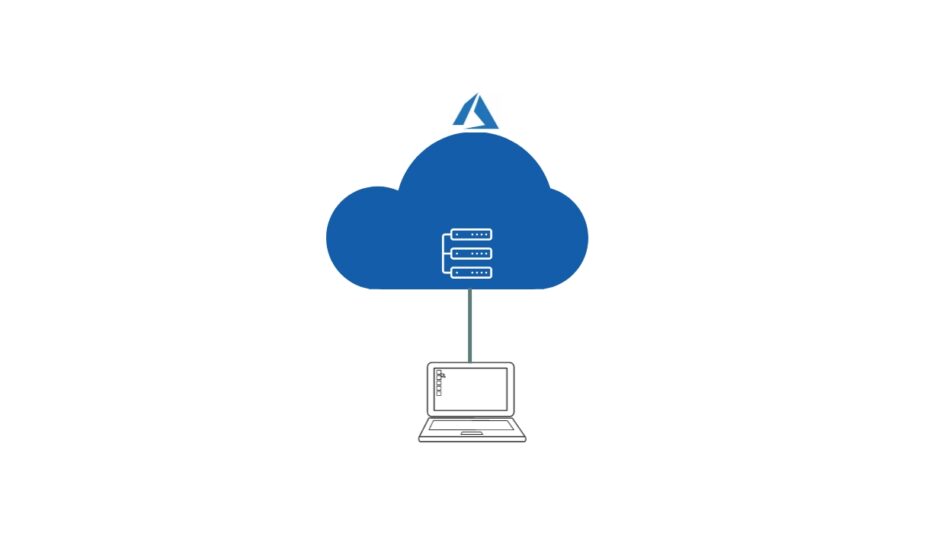
In this blog post i will be taking you through a step by step procedure on how to create a virtual machine, webserver and connect to the internet. The below block diagram depicts the overall picture of the final implementation.
Procedure
Since we will be launching the web server on Azure cloud, the first and foremost thing would be to login to the Azure portal. The subscription that we will be using to login would be Free Trial. You can create your own free trial subscription that provides you with 12 months of popular free services, a credit to explore any Azure service for 30 days, and more than 25 services that are always free.
Step 1 : Create a Virtual Machine, Vnet, Subnet

In order to create a Virtual Machine (VM), you need to click on the Virtual machines icon under Azure services as shown in the above homepage of the azure portal. In the next screen, you need to either click on Add button at the top or Create virtual machine button at the center to get started with the creation of VM.
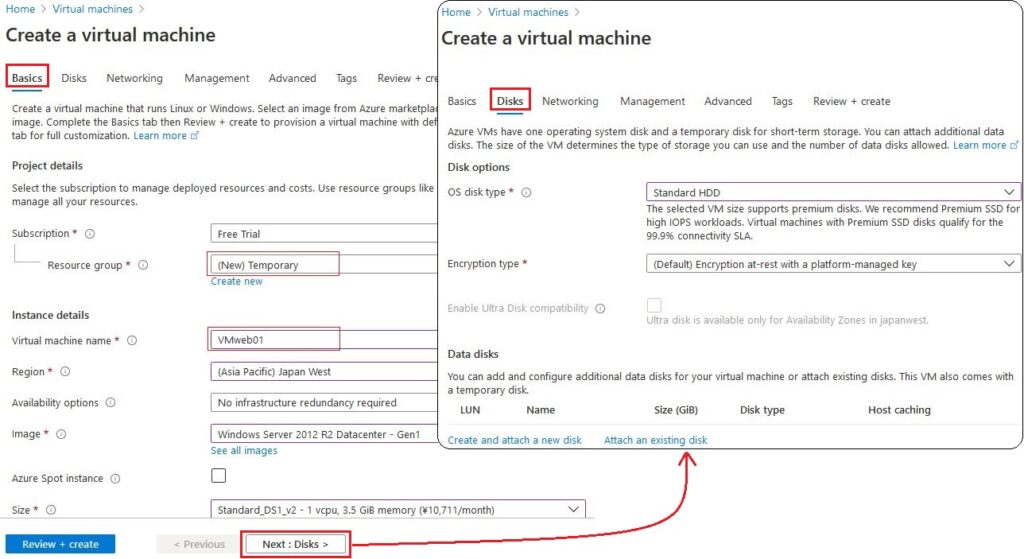
In the Create a virtual machine screen as shown above, under the basics tab enter all the necessary information. Since ours is a Free Trial, select Free Trial for the Subscription, create a new Resource group by clicking on Create new under the Resource group box and enter appropriate department name. For our trial case we have named it as Temporary. Further down, the administrator account login details, inbound port rules (RDP) to the VM needs to be set. Enter the other details as shown above. Once done, click on the Next : Disks button at the bottom to move to the next tab ,i.e, Disks. Enter the information as shown above.
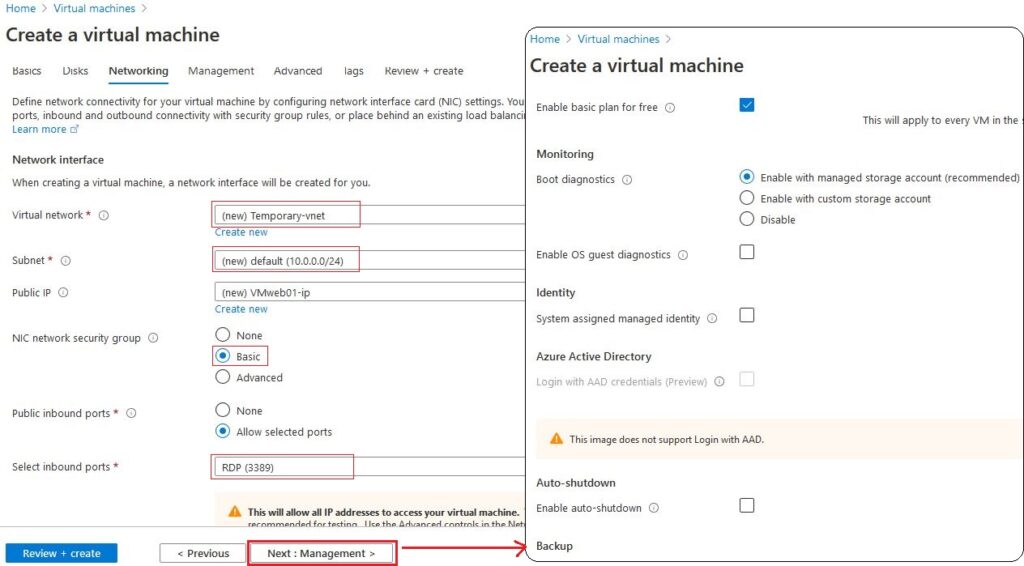
Now we are in the Networking tab, after entering the Disks tab information. Here we can select the information for Virtual network (Vnet), but as we have not created any let us go with the default one created. In order to create a new Vnet, basic information like the address range of the Vnet and the address range of the subnet within the Vnet would be needed. Since we are going with the default Vnet, we will go ahead with the default Subnet, the Public IP required to connect to the internet. The NIC nework security group / firewall is set to basic and appropriate rules will be set for the inbound RDP. Now click on the Next : Management button at the bottom to move to the Management tab and enter the necessary information as shown above.
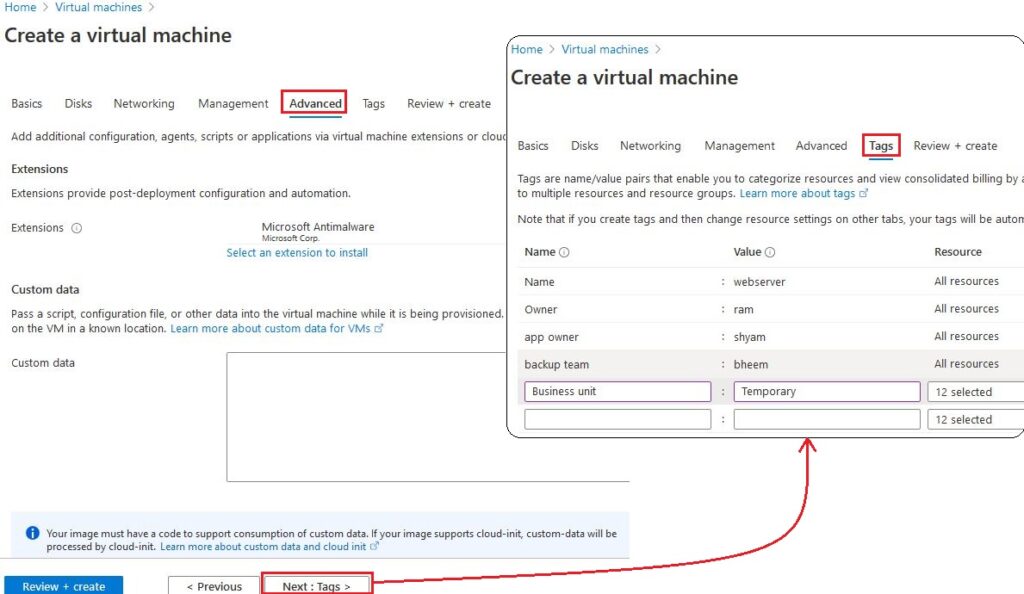
Under the Advanced tab, the Extensions are a means to install clients on the VM like Antimalware. In the next, Tags tab, the purpose is mainly for charging and bill back so that others can know who/which department owns the VM. Click next to start the validation process that may take a minute or more to complete. The same is depicted in the picture below as “Validation passed”.
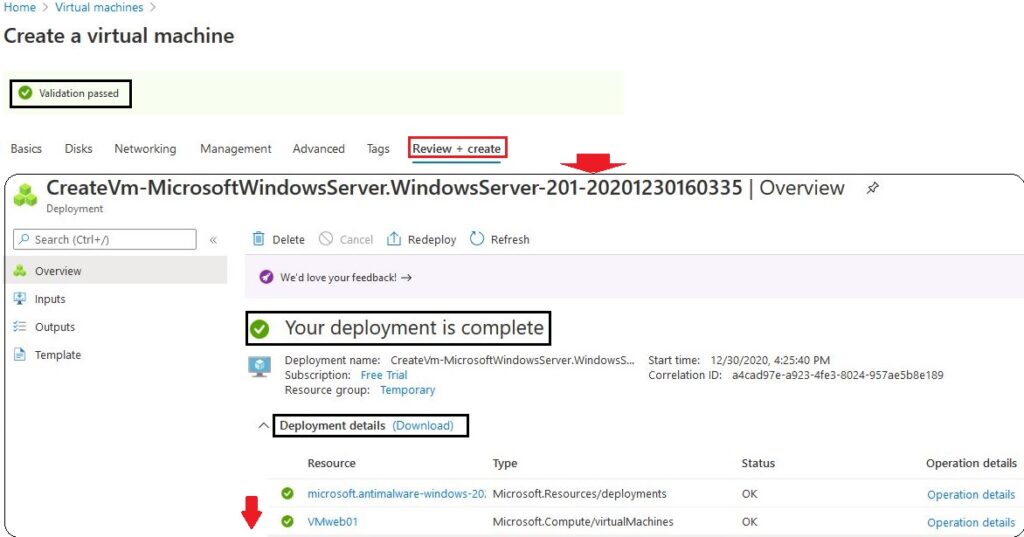
Once the validation is complete, you can create a VM by clicking on the Create button at the bottom of the page. The above screen shows up displaying “Your deployment is complete” once the creation of VM is complete that may take upto 4 to 5 minutes. The deployment details provides details of all deployments like VM, virtual network, public ip etc.
Step 2 : Logon to the VM
Navigate to the Azure Home screen > Virtual Machines, that will provide a list of VMs created. Since we have just created a single VM, click on the VMweb01 that will take you to the following screen. Inorder to connect to the VM, we need to launch the RDP. Just type in “mstsc” in the start menu and press enter to launch the following window. You need to type the public IP address of the VM here that is marked on the right. Once you click on Connect, the pop up to enter your VM credentials should show up. Type your account user name and password to connect to the virtual machine and load your profile.

Step 3 : Upgrade VM to a Web Server
In order to make a web server from the VM, you need to install the web server components. The component is called as IIS on a windows machine, apache/Tomcat on a linux machine. Click on the Server Manager icon next to the start icon on your VM that will open the following window. Click on the Add roles and features item from the list below to open the wizard.

Read through the contents and click next, select the Web Server (IIS) item during the Server Roles stage of the wizard. Click next subsequently and you will reach the final step wherein you need to click install. Once the installation is complete your VM can be called a Web server.
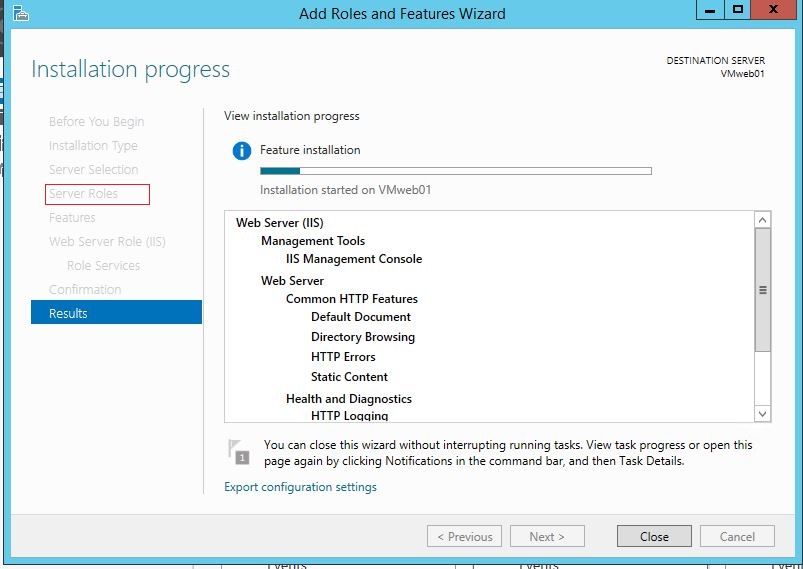
Step 4 : Verify the Web Server
Now that we are ready with the web server, the next step would be to verify the access locally within the VM and from the internet. In order to verify the access locally within the VM, open the IE browser and type in “http://localhost/”, that should open the default page as shown below. This means that the local IIS services are running properly.
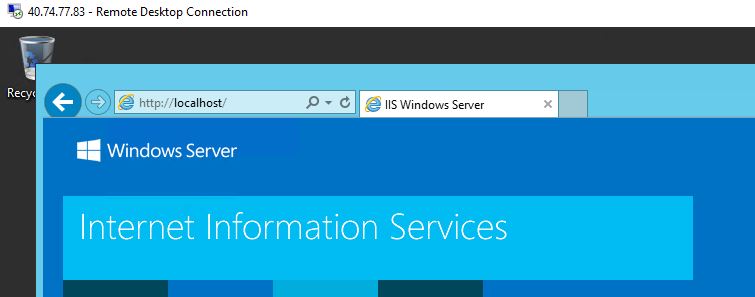
Next step would be to verify the access from the internet. Minimize the RDP to go back to the main PC and launch the browser. Here the above http link will not work as that is used locally within the VM. Now we need to type in the public ip address of the VM ,i.e, “http://40.74.77.83” and connect through port 80 (http). However, this will not work as we had opened the port in security groups for RDP (3389) access and not for http (80) access. Now we need to open the necessary port on the VM. Navigating to the Azure portal home> Virtual machines> VMweb01 – Networking will open the following window.
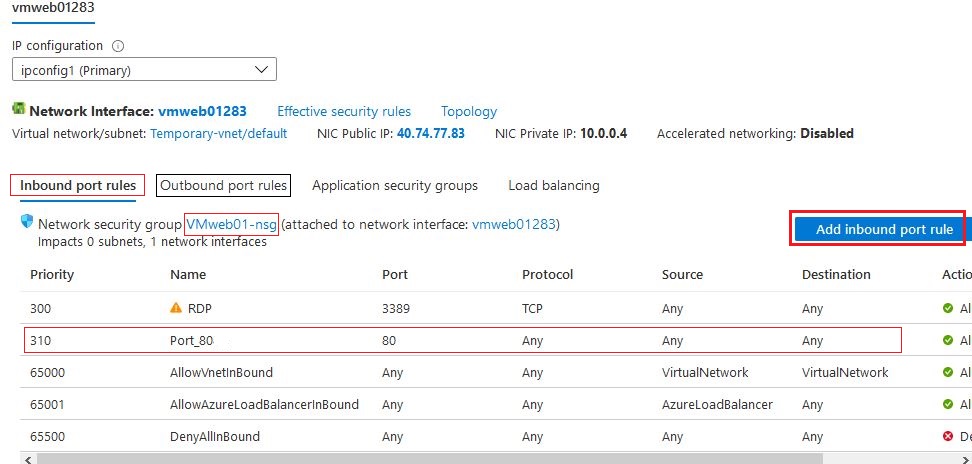
As you can see in the first row of the above picture, the inbound port rules for RDP(3389) was already set. The outbound port rules from the VM to the internet is open by default. Inbound rules are more restrictive in nature. Our next objective is to add port 80. Click on Add Inbound port rule button to enter the information like port range, source, destination, protocol etc and Add the port. As per the final setting shown in the above picture, any website from any destination will be allowed on port 80 on any protocol. Now on your browser, refresh the earlier page with “http://40.74.77.83” address, which should display the default IIS page.
Step 5 : Customize the Web Server
When you install the web server component on the VM, you will have certain folders created under C drive (Ex: “C:\Windows\inetpub\wwwroot\”) . When somebody tries to access the public ip, they will be connecting to the file iisstart.html under wwwroot folder. We can either customize the earlier html page or put our own page here and name it as index.html as shown below. Open the page to write your own html content or enter simple text. NOTE : Check View>File name extensions to display the file extensions and change it.

Since i have input the simple text “sampath here” inside the above file, the same is displayed as shown below. One more point to note is that the local host is pointing to the new file index.html created ealier.

Similar operation needs to be performed on the main PC by minimizing the RDP. Refresh the earlier browser with “http://40.74.77.83” address, which will take you to the index.html file. The same is displayed in the figure below.

Further Reading :

Leave a Reply