Let’s start with the definition of automation. Automation removes the need to perform manual, repetitive tasks by allowing your teams to automate their tasks, processes, and workflows. In one of my earlier blogs, i had touched upon the Jira automation topic. This blog “Essential Jira Automation Rules for Scrum Teams” will delve deeper into jira automation with some useful automation examples.
You can segregate Jira automation into automation rules by using a simple no-code rule builder, which creates automation rules to handle everything from the simplest repetitive tasks to the most complex scenarios. The other type of automation combines the filter feature, which uses JQL, with the subscription feature, where you set conditions to send automated emails.
To access the section wherein you create the automation rules, navigate to the Project settings > Automation > Rules section. Following are some of the automation rules that i have created. This can be particularly useful if you are working on an Agile scrum project.
Sync the status of Subtask to Story and Story to Epic
This automation rule will be useful when the status of a subtask or story changes to In progress and the parent story or epic is in ToDo or Done status. This rule ensures the parent story/epic status syncs with the subtask/story status.
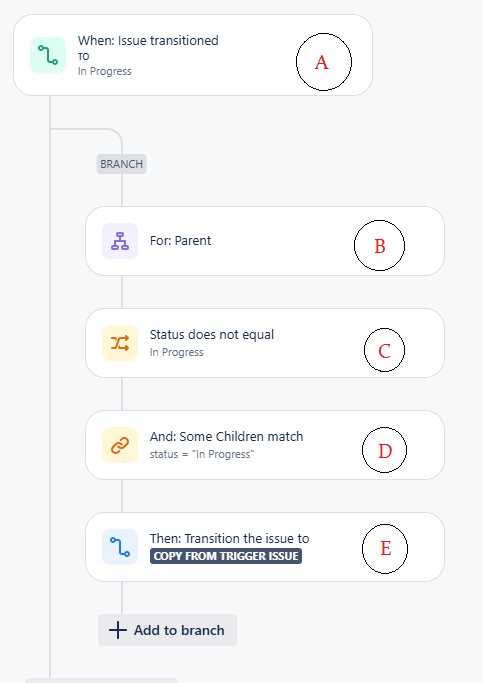
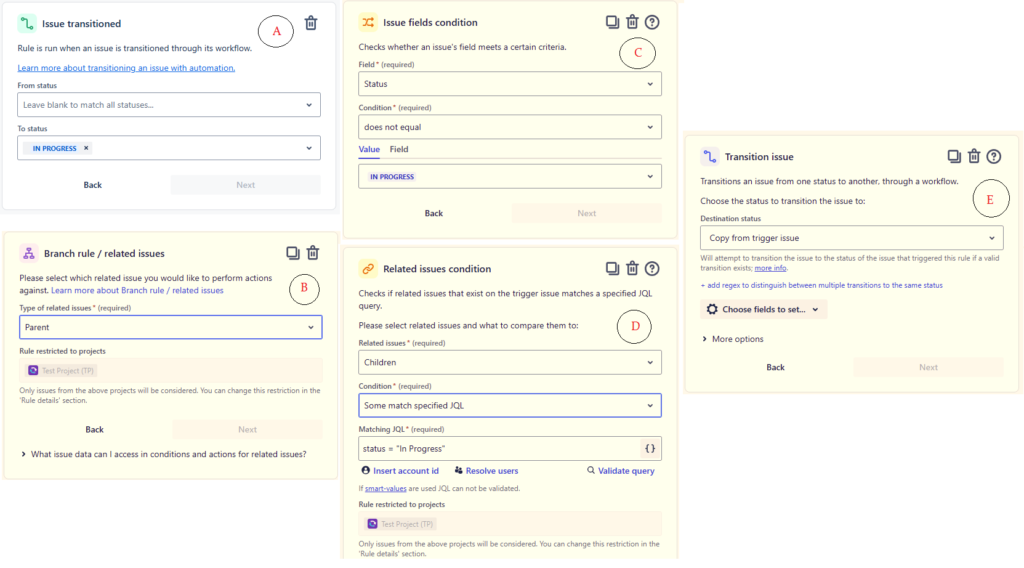
The automation rule consists of steps A-E. Find the details of each step as follows.
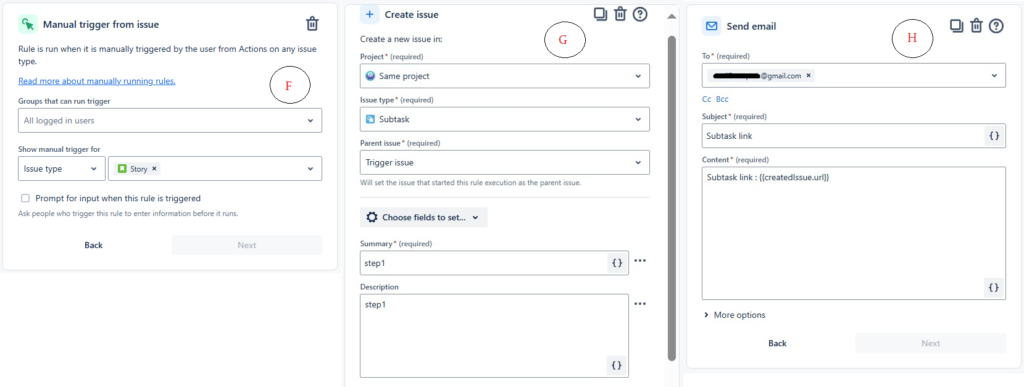
Create Subtask with a single click
You can use this automation rule to create a subtask with a single click. An optional step allows you to inform any concerned person about the created new subtask.
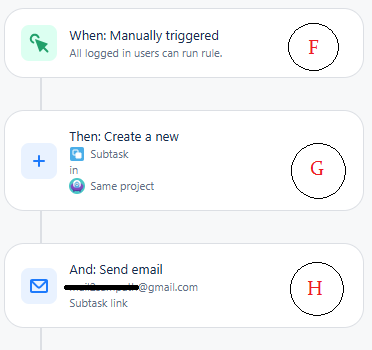
After setting the automation rule, a new section appears under “Actions” with the rule name, as shown in the picture below.

This automation rule consists of steps F-H. The settings required for each step are displayed in the picture below. The step H shows the smart value that can be used when you want to display the issue URL in the mail.
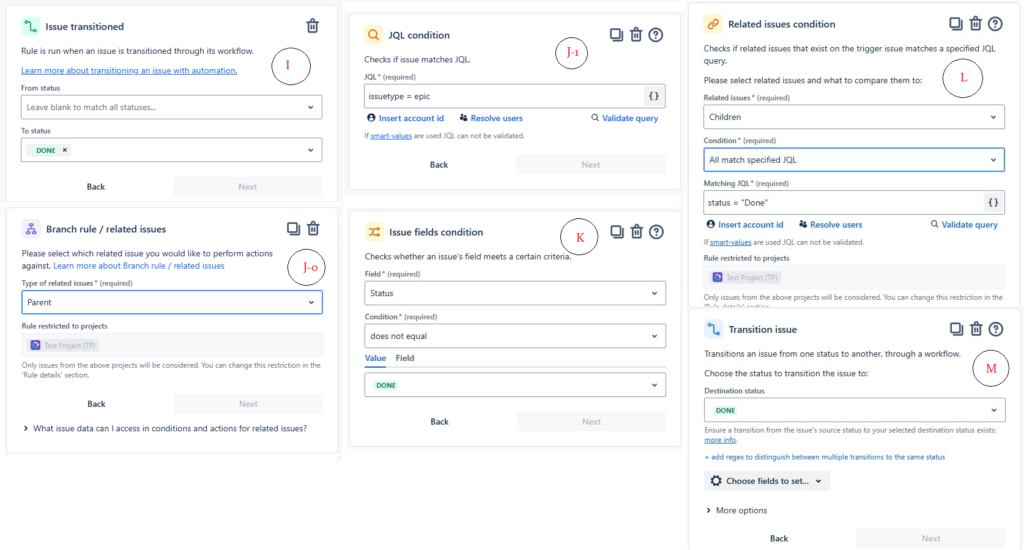
Sync the status of Story to Epic
You can use this automation rule to automatically change the status of an epic to “Done” when the status of all its stories changes to “Done.”
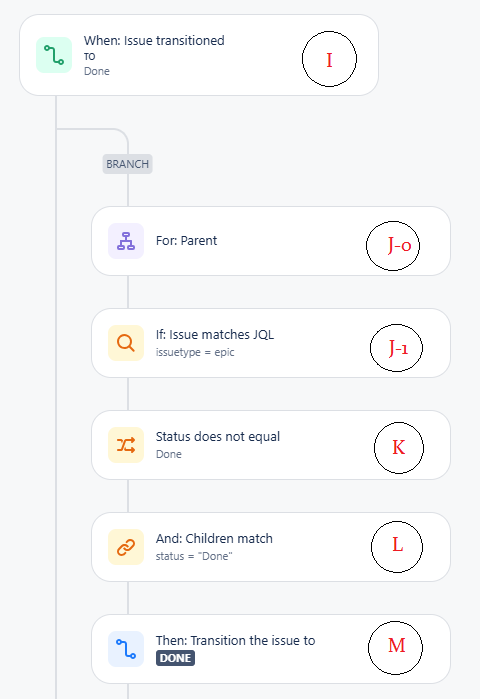
You can implement the steps I-M involved in the above rule using the following settings.
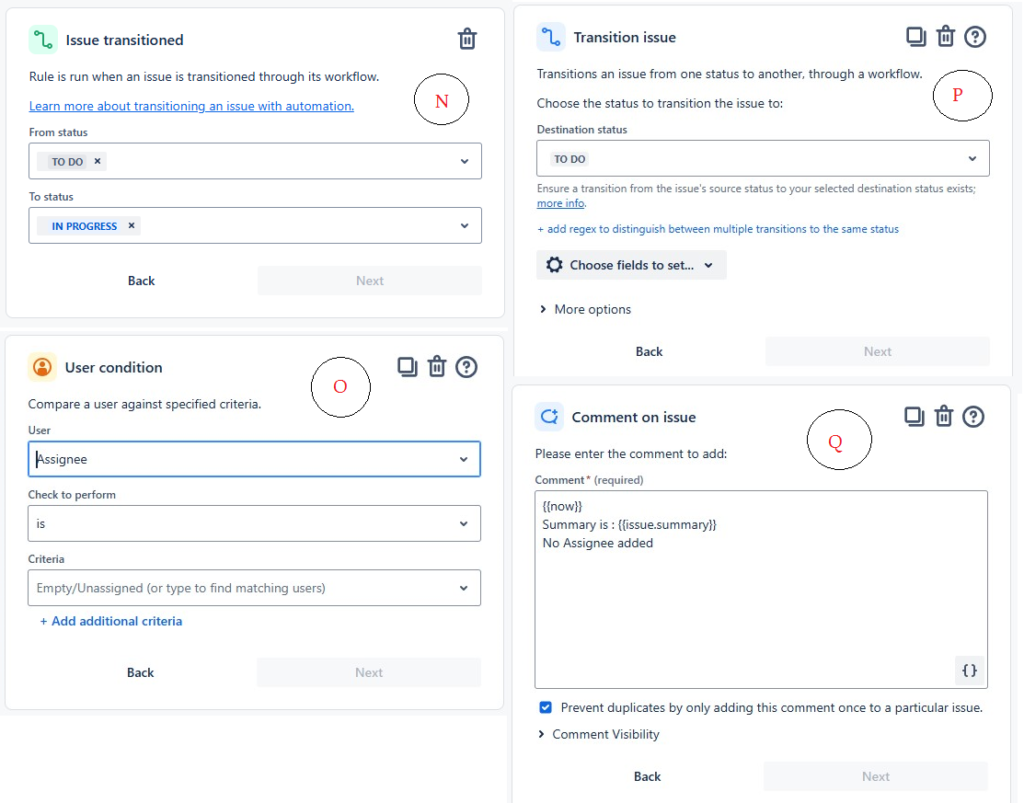
Move unassigned Subtask/Story to ToDo from Inprogress
You can use this rule to ensure that all subtasks and stories are assigned before changing their status to “In Progress”. If someone moves an unassigned subtask or story to “In Progress,” the system will move it back to “To Do.” It will include a comment with the current time, issue summary, and the text: “No Assignee added.”
This automation rule involves steps N-Q. The detailed settings for each step are displayed in the picture below. Step Q shows the smart values you can use to display the current time and issue summary.
Check the work log entry and mail assignee
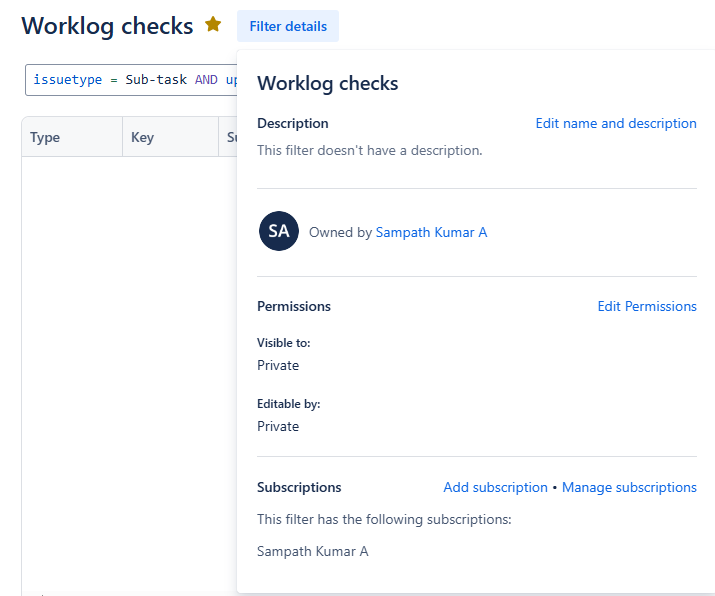
Unlike the other automation rules, you create this one by navigating to Filters > View all filters and clicking on Create filter. The following filter will help you to filter out all the subtasks that have not been updated in the past one day. I found that the issuetype = Sub-task does not filter any subtask in the Jira free tier but does filter out subtasks in the standard version.

After filtering, the next step is to automate sending an email to each assignee. To do this, navigate to Filter details and select Add subscription.
In the next screen, you can select the Recipients as Personal Subscription if you would like to set a mail reminder to yourself. There are other options under Recipients that can be selected if applicable. If you want to add a new group under Recipients you need to have the admin access.
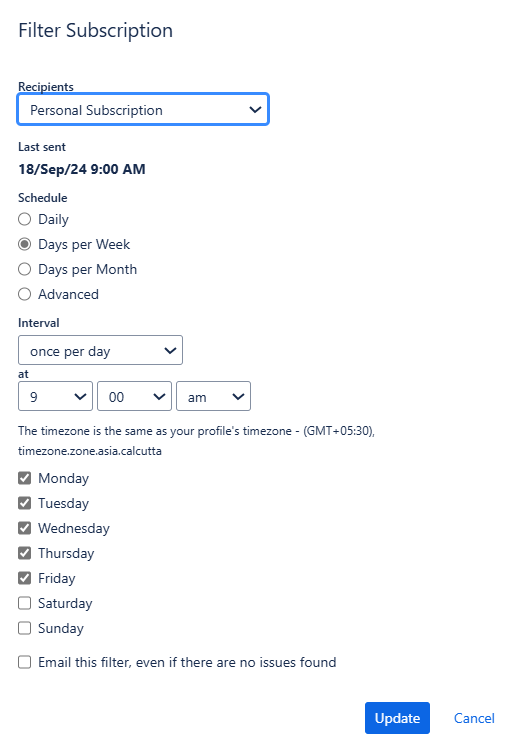
You can customize options like Schedule and Interval as needed. Once you set the subscription, you can add two or more subscriptions to the same filter.
In this blog post, i have provided the above automation examples. However, if you want to explore more on automation rules you can refer to templates that is present under Project settings > Automation > Templates section. One more useful feature is the audit log. You can review an audit log for each of your rules to see when the rule was triggered, the final result of the execution, and any actions that were performed.
Further Reading :


Leave a Reply