A macro is a piece of programming code that runs in Excel environment and helps automate routine tasks. In a layman’s language, a macro is a recording of your routine steps in Excel that you can replay using a single button. When you create a macro, you are recording your mouse clicks and keystrokes. After you create a macro, you can edit it to make minor changes to the way it works.
Basically, the automation of tasks is possible by making use of the Excel ‘Record Macro’ function and/or the VBA code.
Before you record a macro or start VBA coding
Macros and VBA tools can be found on the Developer tab, which is hidden by default, so the first step is to enable it. Follow the below steps to enable it. (Office 2010/13/16/365)
1.Click the File tab.
2.Click Options.
3.Click Customize Ribbon.
4.Under Customize the Ribbon and under Main Tabs, select the Developer check box.
Record a macro
In the Code group on the Developer tab, we have ‘Use Relative References’ function which we will learn before heading forward with ‘Record Macro’. Whether it is good to select the ‘Use Relative references’ before clicking on the Record Macro depends entirely on the kind of functionality we expect out the macro we are planning to record. The two kinds of references are as follows;
• Absolute Reference – This is the default state ,i.e., with no option selected. Macro will run from the cell recorded in any sheet.
• Relative Reference – This is the state wherein the ‘Use Relative Reference’ is selected. Here the Macro will run from any cell you select in any sheet.
Now, in the default state let us select Record Macro.


Optionally, enter a name for the macro in the Macro name box, enter a shortcut key in the Shortcut key box, and a description in the Description box.
Before clicking OK, it is better to know what are the other options under “Store macro in” drop down area. I will list and detail on the same as follows;
• Personal Macro Workbook
This selection lets you run the macro in any workbook. It opens automatically when excel is opened.
• New Workbook
This is selected if you want to begin recording a macro even without opening the workbook. The macro will be stored in a new workbook and can be run in that workbook.
• This Workbook
This selection stores the macro exclusively in the active workbook. The macro can be run in any workbook but only when the active workbook is open.
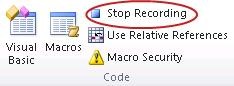
Now click OK to start recording. Perform the actions you want to automate, such as entering plain text or filling down a column of data. On the Developer tab, click Stop Recording.
Now, press “ctrl + shortcut key“ in a new sheet to execute the macro.
There are two ways of saving a macro enabled workbook which is explained as follows;
• Excel Macro Enabled workbook(.xlsm) – This extension is used to save a file with a macro. The same data file with the macro will open the next time we open it.
• Excel Macro Enabled template(.xltm) – This extension is used to save the file (with macro) as a template. This file can be used by many people as a template to customize based on their needs.
Macro automation is depicted in the below figure with their limitations;

User-Defined VBA Function & Sub Procedures
In Excel Visual Basic for Applications or VBA, a set of commands to perform a specific task is placed into a procedure, which can be a Function procedure or a Sub procedure (also known as functions and subroutines).
The main difference between a VBA Function procedure and a Sub procedure is that a Function procedure returns a result, whereas a Sub procedure does not.
Therefore, if you wish to perform a task that returns a result (e.g. summing of a group of numbers), you will generally use a Function procedure, but if you just need a set of actions to be carried out (e.g. formatting a set of cells), you might choose to use a Sub procedure.
Starting with Excel VBA code
To start with, the VBA file coded is to be saved in *.bas format. Once the code is ready, move to the Developer tab in Excel and click ‘Visual Basic’ button which will open the VBA editor. Now click the import file under the File menu to select the *.bas file and open it. In the VBA editor on the project explorer window we can see that a new ‘Modules’ folder is created with our code file under it with name as ‘Module1’. Click on Module1 to open the code and check the contents.
The other method is you write the VBA program directly in a specially inserted workbook page which is the same as earlier module. As explained earlier, to create a module you have to be in the VBA editor. This module is a word processor that expects you to type VBA commands. Each module you create is given a default name – Module1, Module2 and so on – but you can rename it quite easily by typing a new name into the Properties box at the bottom left.
All programs in VBA have to start and end in a particular way. The first line has to read
Sub name()
where name is the name you want to give your program. Sub is short for Subroutine.
The final line of the program has to be :
End Sub
and leaving this off makes Excel think you haven’t finished your program.
If you enter these lines you will notice that the Sub and End Sub automatically appear in blue and with the correct capitalization. This is because they are VBA keywords – a fixed set of commands that VBA recognizes . To show that it has detected a key word it turns the word blue.
Now we have the start and ending lines of a valid VBA program,all we need is to input instruction or code that lets us do something on the input data.
Once code contents are confirmed, input necessary data in the respective cell of the excel file and run the code by clicking the Run Macro under Run menu. Check the output to verify the logic of the code.
Check out the sample code below which converts Upper case words/letters to lower case;

As an additional feature we can as well create a button and assign the above macro to it.

As shown in the above figure, click on the button icon under Insert option of Developer tab and create a button shaped structure which will automatically move you to the ‘Assign Macro’ window. Now from the list displayed select the appropriate macro and click OK. So, now we have assigned the above code to a button.
Give the button an appropriate name by editing the text on it. Now, just enter the necessary data in the respective cells and click on the button to have the output displayed.
Declaring Variables & Constants
Before using a variable or constant, you need to declare it. This is done by adding a simple line of code to your macro, as follows.
Dim Variable_Name As Data_Type
Example:
Dim sVAT_Rate As Single
Dim i As Integer
Constants are declared in a similar way, except a constant should always be assigned a value when it is declared.
Examples of the declaration of constants in VBA are:
Const iMaxCount = 5000
Const iMaxScore = 100
Operator Types
Arithmetic Operators

Concatenation Operator
You use the concatenation operator (&) to combine text strings within an expression. One way to use the concatenation operator is to combine string literals. For example, consider the following expression:
“soft” & “ware” result would be software.
Comparison Operators
You use the comparison operators in an expression that compares two or more numbers, text strings, variables, or function results.

Logical Operators
You use the logical operators to combine or modify true/false expressions. Table below summarizes VBA’s logical operators.

Referring to Ranges
Many beginners start their career using Cells and Ranges.
Few examples of the same are as follows:
Cells(1,1).Select means (row 1, column 1) and is the same thing as Range(“A1”).Select and
Cells(15,47).Select means (row 15, column 47) and is the same as Range(“AU15”).Select.
Cells.Select means select all the cells of a worksheet.
Cells.ClearContents means empty all cells of values or formulas.
Range(“A1:G5”).Select means select a set of contiguous cells.
Range(“A1,A5,B4”).Select means select a set of non contiguous cells.
Range(“A1,A5,B4:B8”).Select means select a set of non contiguous cells and a range.
The offset property is the one that you will use the most with Range to move around the sheet.
Few Examples:
To move one cell down (from B2 to B3): Range(“B2”).Offset(1,0).Select
To move one cell to the right (from B2 to C2): Range(“B2”).Offset(0,1).Select
To move one cell up (from B2 to B1): Range(“B2”).Offset(-1,0).Select
To move one cell to the left (from B2 to A2): Range(“B2”).Offset(0,-1).Select
To move one cell down from the selected cell: ActiveCell.Offset(1,0).Select
Decision Making Statements/Controlling Program Flow
The VBA decision statements “If” including Then, ElseIf and End If, nested if, switch tests for equality against a list of values. There are also the “Do” statement including Loop, Until, While and Exit, there is the “For” statement including To, Step, Next and Exit which are part of the decision statement.
Example: Delete the entire line when a certain cell is empty in a table
First enter xxx where you want the loop to stop (below the last value of column B). Select the cell at the top of the column containing the values to be considered (B1)and run the macro.

Sub proDelete()
  Range("B1").Select
  Do Until Selection.Value = "xxx"
   If Selection.Value = "" Then
    Selection.EntireRow.Delete
  Else
   Selection.Offset(1, 0).Select
  End If
 Loop
 Range("A1").Select
 End Sub
MsgBox Function
In VBA for Excel the message box (MsgBox) is the primary tool to interact with the user. For example you might want to tell the user that a long macro has finished running and you might want to tell him the result which is in the message box.
Example: Copy & paste the below code in VBE and check the result
Sub proLessson17c()
  Sheets("Sheet1").Select
  Range("A1").Value = 695
 MsgBox "The result is " & Range("A1").Value
End Sub
Once the macro is run, the value 695 is entered in cell A1 and the following message box appears

VBA coding tips
Always key in your code in lower case letters. If the spelling is right, the necessary letters will be capitalized when you press “Enter”. If no letter gets capitalized …. check your spelling.
Example:
Open a new workbook in Excel and use the ALT/F11 keys to go to the visual basic editor.
Sub Test()
  activecel.cop
End Sub
We notice that there are no capital letters in activecel.cop as there is a misspelling. Add a second “l” to “activecell” and an “y” to “copy” and then click “Enter”. The sentence now reads: Activecell.Copy with a capital “A” and a capital “C” because both words are spelled correctly.
The VBE will also tell you that there is a syntax error in what you have just written by making the font red and showing you a message box.
Example:
Open a new workbook in Excel and use the ALT/F11 keys to go to the visual basic editor.
In the code window of any of the sheet copy/paste the following line of code:
Range(A1").Select
and click “Enter”.

You get the above message box telling you that you are missing a “list separator”. Look for the error before the segment highlighted in blue. We can deduce that VBA is talking about the missing quotation mark.
Sources :
Online Learning & Work Experience


Leave a Reply