n8n (pronounced either en-eight-en or nodemation) is an automation tool that lets you create custom workflows. It can be considered as a leading tool with a better user experience for agentic AI tasks compared to alternatives like Zapier and Make.com. It offers a 15-day free trial with 1,000 free workflow executions, which is sufficient to try out various sample automations. The platform leverages a strong open-source community that creates predefined workflow templates. These templates accelerate development and can be imported directly from a JSON file, or via a URL from platforms like GitHub.
This flexible automation tool can be used to connect different applications and services, allowing users to build complex workflows with minimal coding knowledge. The workflows are built using nodes, which starts with a trigger that initiates the flow, followed by action nodes that perform tasks, and an output process which is the final result. In this blog, I will introduce you to a workflow automation that is enhanced using LLM.
It is common to have different categories of user requests handled through dedicated request forms. Typically, these requests first reach the Level 1 (L1) support team, which then analyses them and routes to the appropriate department or specialist for action if it does not fall under L1 scope. However, users sometimes submit requests through incorrect forms, leading to processing delays and additional work for support staff. Over time, such inefficiencies can add up, affecting both response times and overall user satisfaction.
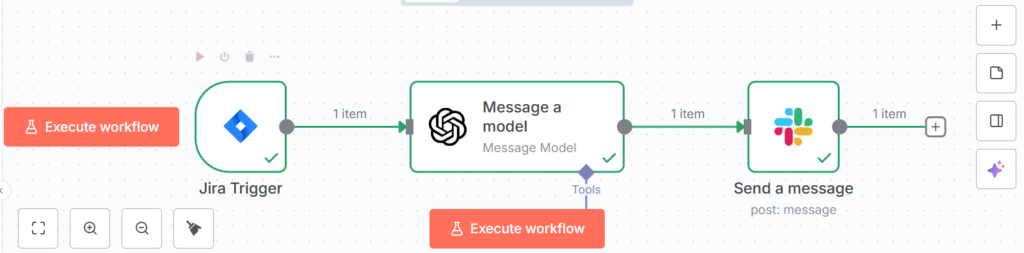
In order to overcome the inefficiencies, we will design a workflow that will have the Jira SM, OpenAI LLM and Slack nodes. Jira SM form entry and submission from a user will be the trigger to start the workflow. Open AI LLM will be the action node that will perform the action of segregation to respective team based on the system prompt provided in the node. Finally, the slack node will receive the data from Open AI LLM node and display it in the channel specified.
Jira SM Node
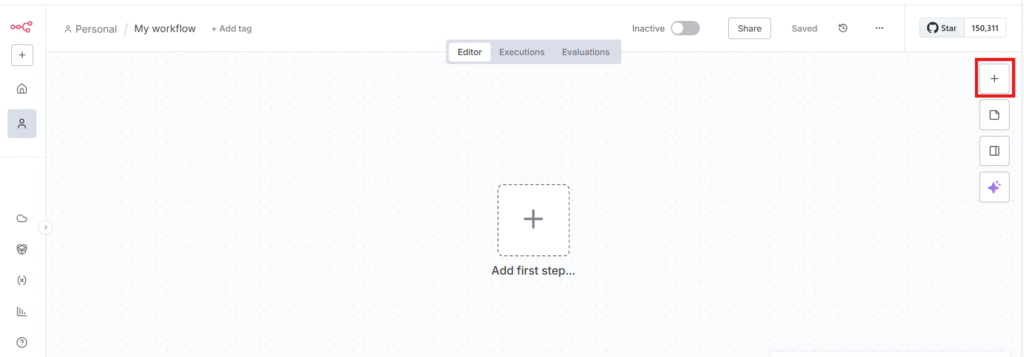
On the top right-hand side click the + icon, which indicates the “Open nodes panel” wherein we can search for the nodes to be inserted to our workflow.
Under Jira node tree, select the “On issue created” node and set the parameters. Refer to the below image for the setting to be done.

Under parameters, in the “Credentials to Connect to Jira” section, select the “Create new credential” and specify the details as displayed in the next window that appears, i.e, email id, API token and domain in order to connect your node to your Jira account.
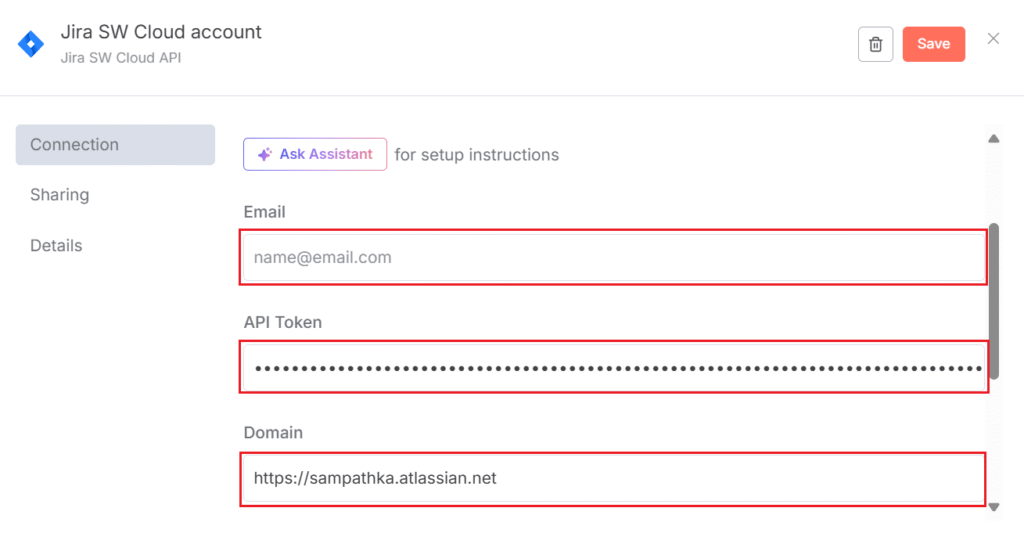
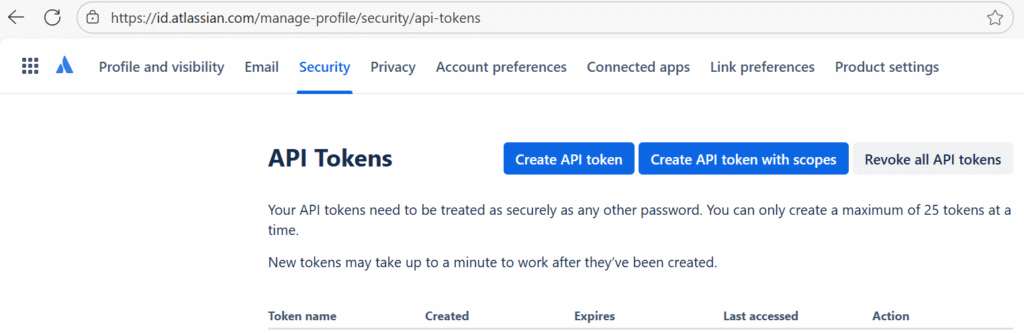
For the API token, login to your Jira account and navigate to Account settings > Security > API tokens and click on “Create and manage API tokens” which will take you to the below screen. Create your API token and paste it to the section as in the above image along with the domain information ,i.e, “https://sampathka.atlassian.net/” in our scenario. Finally, click on Save button and you are done with the setting to connect your Jira account to your node.
OpenAI Node
Since we are done with the setting for the above node, next we will click on the + icon at the top right and search for the next node. Under OpenAI node tree, select the “Message a model” node and set the parameters as shown in the image below.
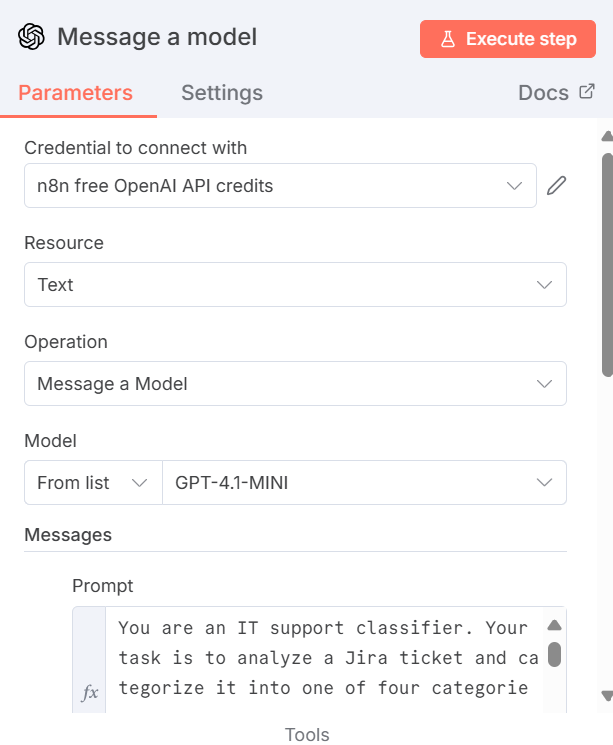
For the credentials to connect to OpenAI we can make use of the free 100 credits available. Select the resource (input is text), operation and model (any simple LLM model is fine) as shown above. Now we are left with the prompt section which is where we specify the system prompt for smart decisions. Below you can find the file that contains the system prompt. Set the Role to User and enable the Simply Output and Output Content as JSON options and you are done with the settings for this node.
Slack Node
Next we will move on to the Slack node. On the top right, click on the + icon and search for “Send a message” node under Slack node tree.
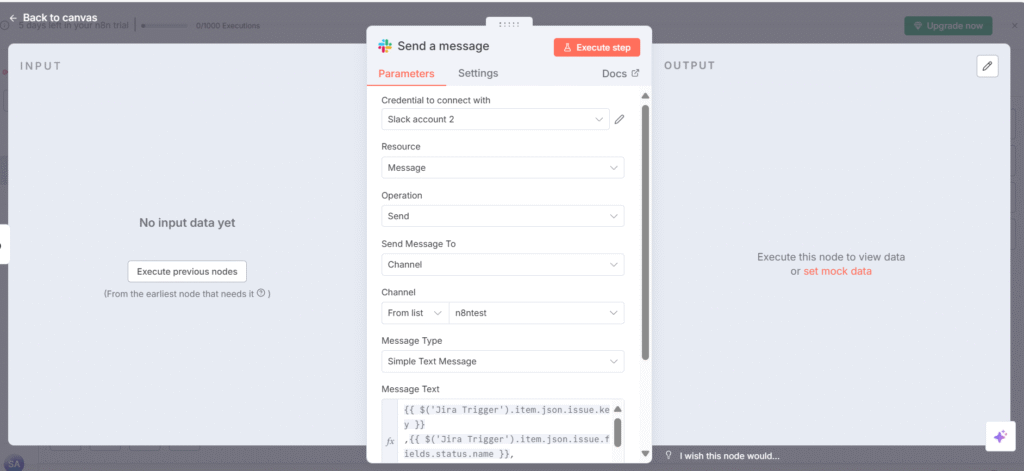
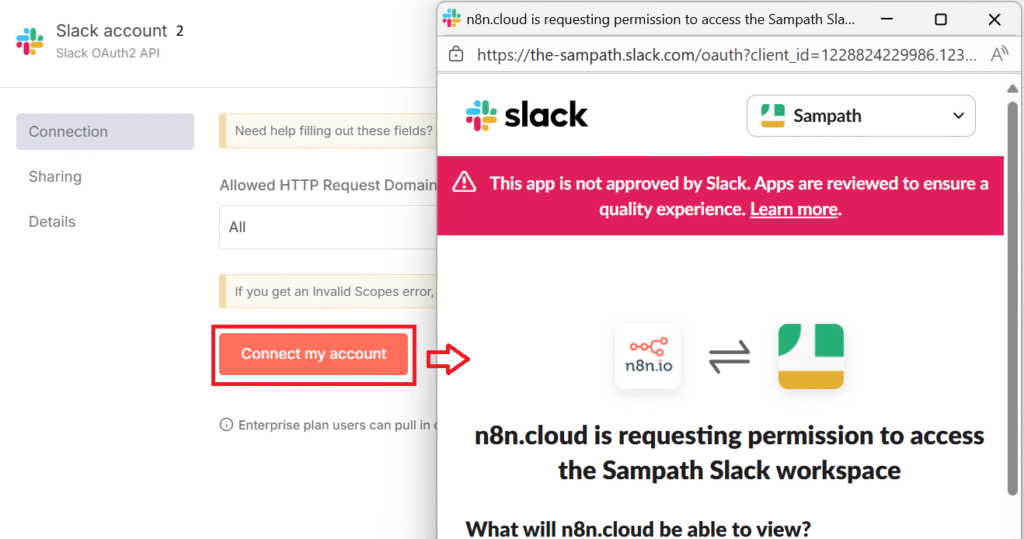
On parameter setting screen of the above node, you need to connect to a Slack account using the “Create new credential” option under “Credential to connect with” section. In the next screen, click on the Connect my account button and your Slack node will be connected to your Slack account (Slack account 2 used in this example).
The other parameters of the node ,i.e, the Resource, Operation and Send Message To needs to be set as shown in the earlier node screenshot. In the next option, you need to select the Slack channel to which the message is to be sent (n8ntest is the channel in our example). After setting the message type as “Simple Text Message”, enter the format of the output under Message Text as follows and you are done with the setting for this node.
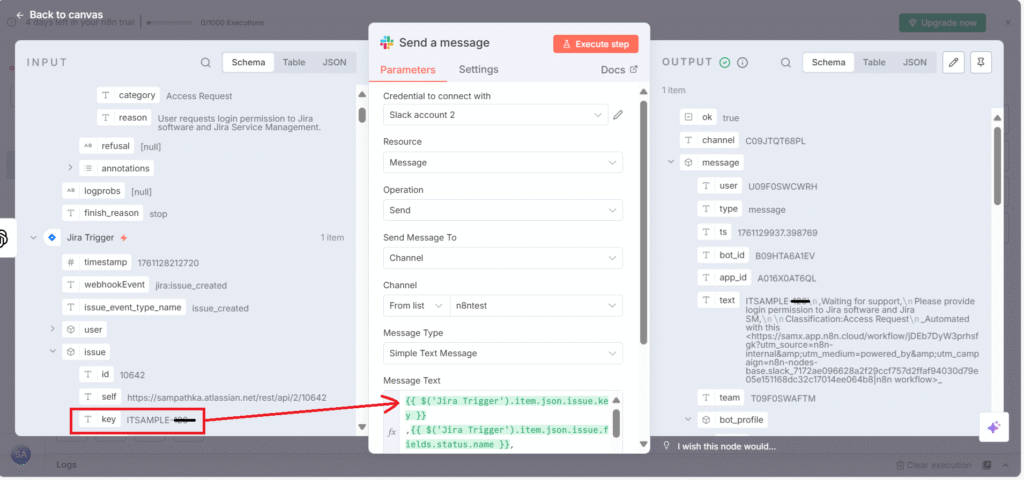
{{ $('Jira Trigger').item.json.issue.key }},
{{ $('Jira Trigger').item.json.issue.fields.status.name }},
{{ $('Jira Trigger').item.json.issue.fields.description }},

Classification:{{ $json.message.content.category }}
The above JSON under Message Text can also be set by dragging the output of Jira trigger node as shown below. The input and output sections will be visible once you execute the step/workflow.
Connect all the three nodes to each other as follows.
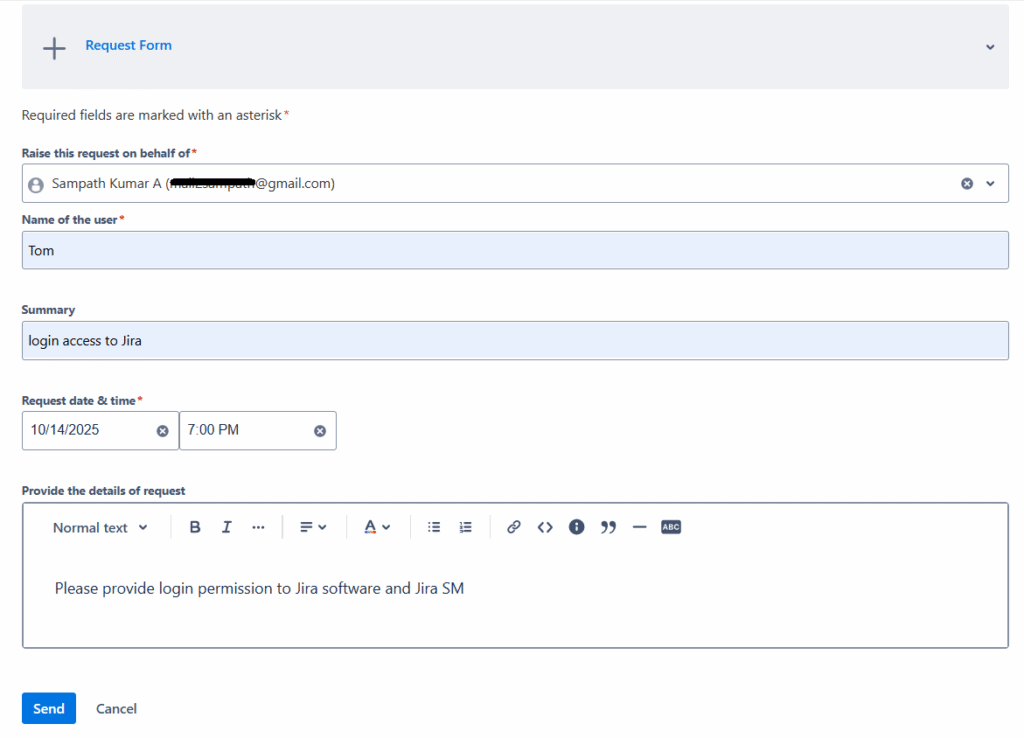
The workflow is not yet complete ,i.e, you need to have a trigger to start the workflow. For this, we will use the forms feature in JiraSM that will automatically generate a ticket once the form is submitted by a user. Inorder to create a form you can refer to my other blog here. The form user interface will appear as follows. The users can submit their service requests using the following form.
Executing the Workflow
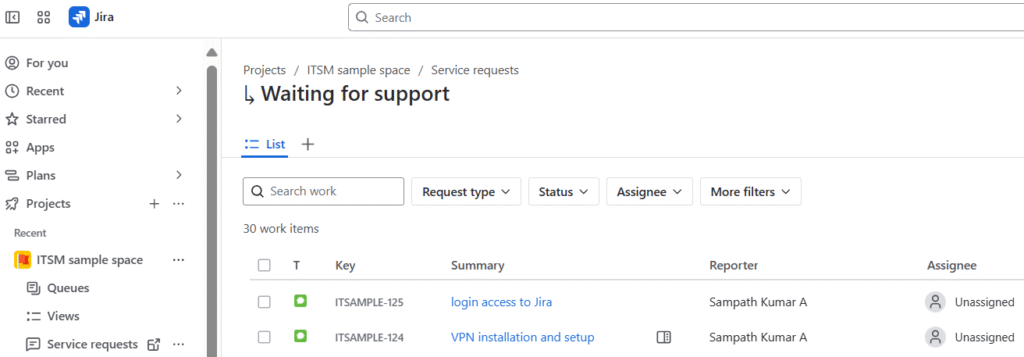
Inorder to check the workflow, click on the “Execute workflow” button at the centre as shown in the three node connected workflow above. The workflow will not wait for the form to be submitted by a user. Submit the form by inputting all the sections as shown above and click on the Send button. This will generate a ticket (ITSAMPLE-125) on JiraSM that will appear as follows.
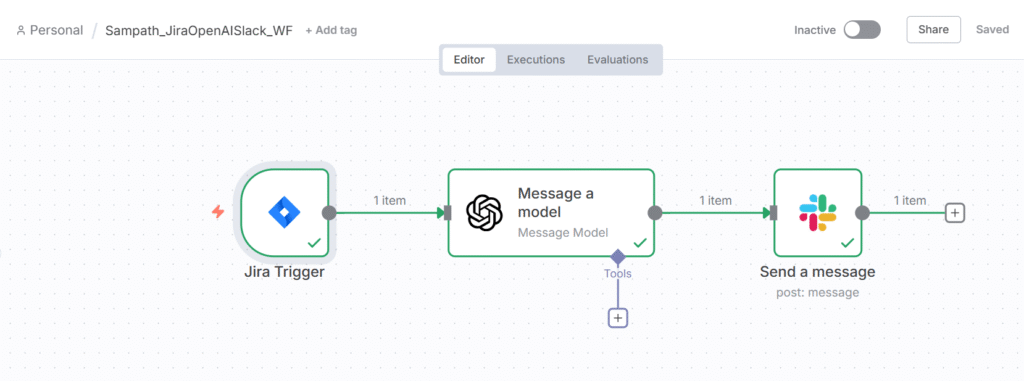
Now the workflow is triggered and all the three nodes will be executed one after the other. If there are no errors generated, the nodes will appear as follows after successful execution (green tick mark on each node).
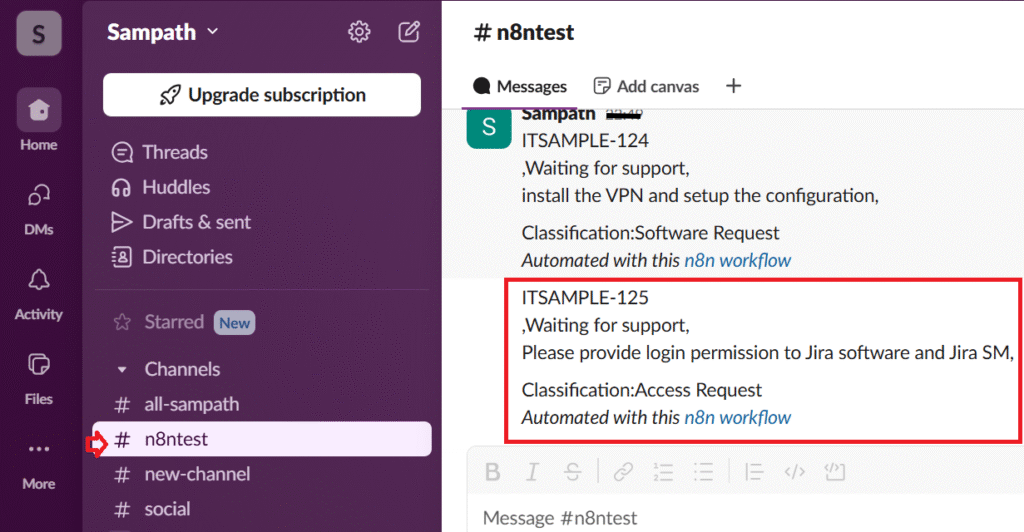
Since our workflow is connected to a Slack channel, we will have to check the appropriate channel(n8ntest) for the output message. You can see the latest JiraSM ticket number, followed by the status of the ticket, description and the classification of the ticket into a category for the appropriate team to take necessary action.
Further Reading:


Leave a Reply