Jira Service Management offers users a single place to go for help. Through a centralized global customer portal, employees or customers can easily access every service desk across an organization.
Service request management projects come with easy to edit request types and workflows, flexible service level agreement (SLA) settings, email channels with adjustable notifications etc. While there are some variations in the way a service request can be captured and fulfilled, it’s important to focus on driving standardization to improve overall service quality and efficiency. In general, we have two types of Service Requests: one is without approval, and the other with the approval status. In this blog, “Quick Fixes for a Faster Jira SR: Setup Approvals, Sharpen SLA, and Workflow Cleanup” we will take up the “Service Request with approvals” issue/work type.
Service Request with Approvals
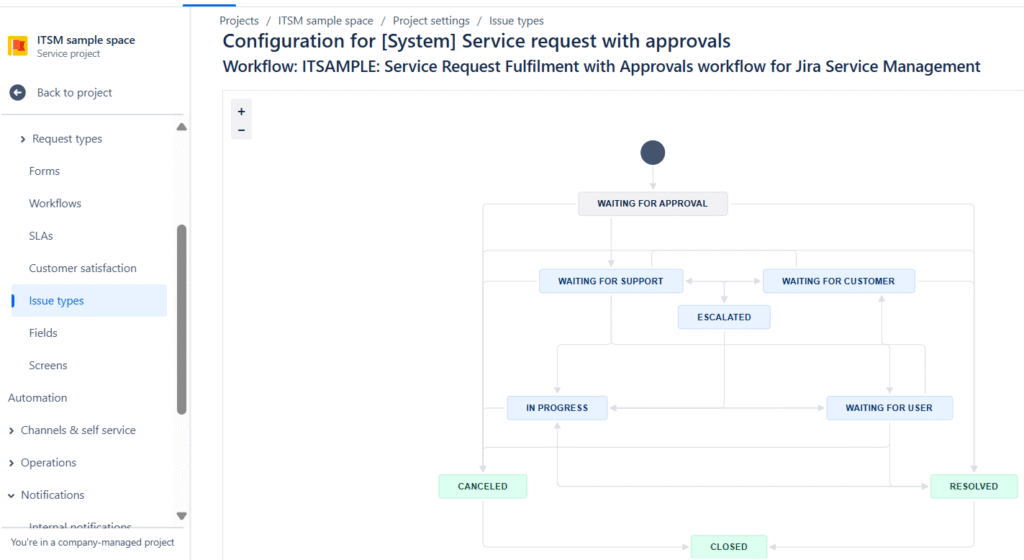
The decision to use SR with approvals issue type depends on the complexity and risk associated with the service request. If external validation is needed to ensure accuracy, compliance, or proper execution, approvals should be implemented. If the request is straightforward and can be handled by the assigned agent, then an approval step may be unnecessary. The default “Service request with approvals” issue type will appear as follows.
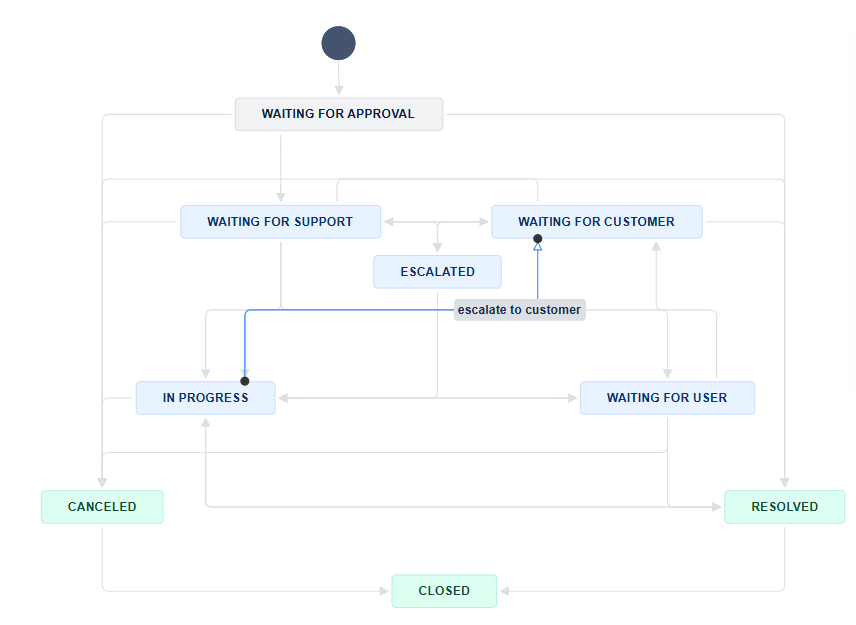
Workflow Improvement
Since we will be calculating the SLA for the tickets using this workflow, to ensure proper calculation we will add a transition from “In progress” status to the “waiting for customer” status and vice versa in the workflow. In general, the Project admin role will not be able to edit the workflow, for this you will need to be a Jira admin. The changes are implemented in the next steps as follows:
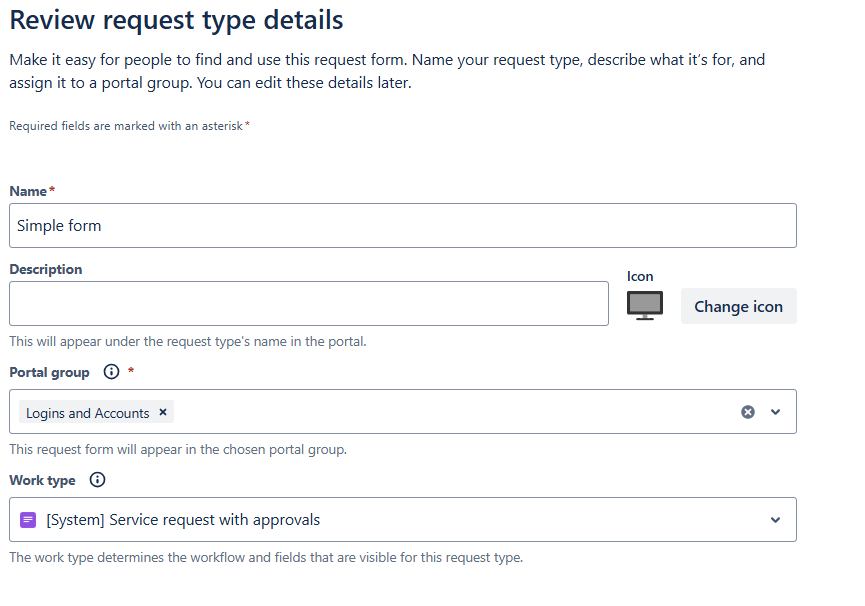
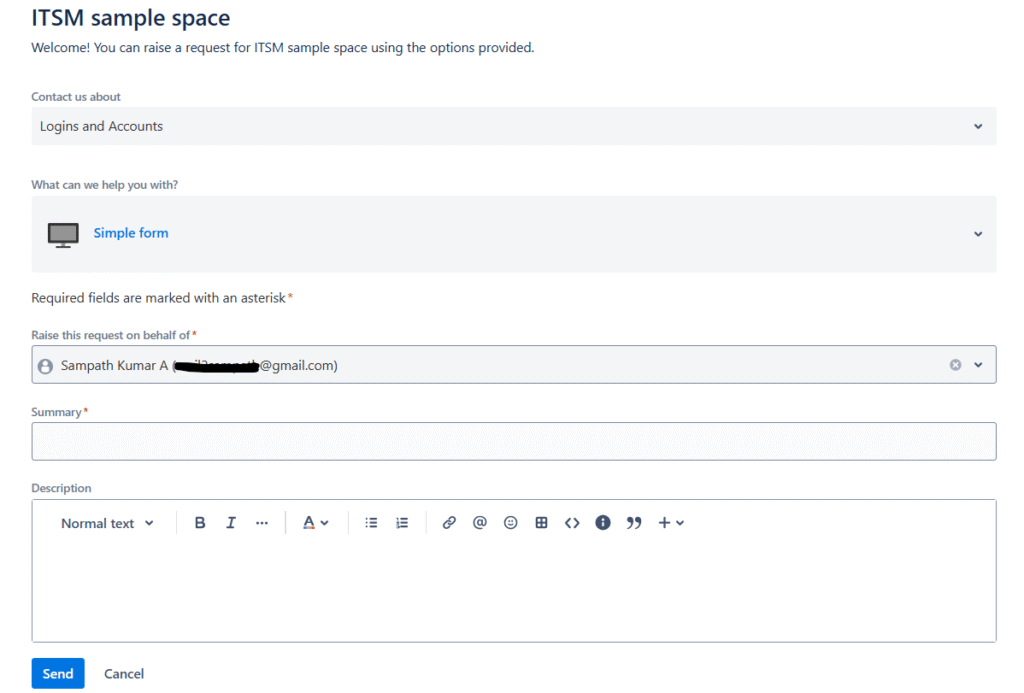
Creation of Service Request Form
Now that we are ready with our issue/work type, the next step would be to create a form using the above issue type with the updated workflow. Let us create a simple native form without attachment.
The sections can be seen as shown in the below “Simple form” picture. Summary and Description are the inputs from the user, while the other sections are hidden from the user. Labels section would be needed to display the ticket on a kanban board, while the Approvers section need to be input with email id of the approving authority. Multiple people can be specified but anyone from the specified list can approve the request.

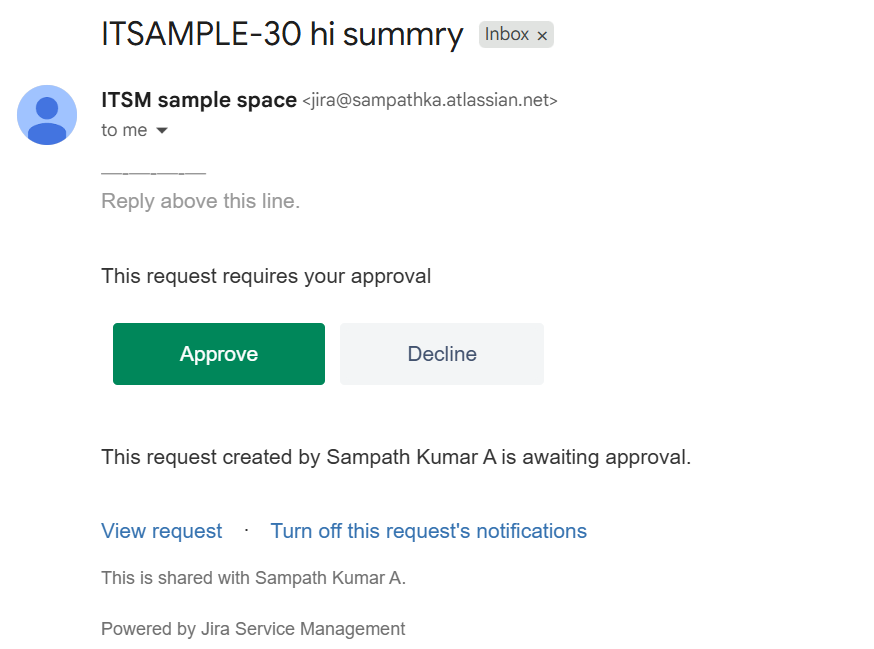
Approvers get an email once the user submits the form. The template of the notification mail can be seen as shown in the below picture. In the standard version and above of Jira, this template can be edited to include the description of the Jira ticket as well (appropriate variable needs to be included in the Content section). If you are using an external form as an attachment and want to reflect the description there onto the contents of the mail, don’t forget to select the link to jira section in the attached form edit option.
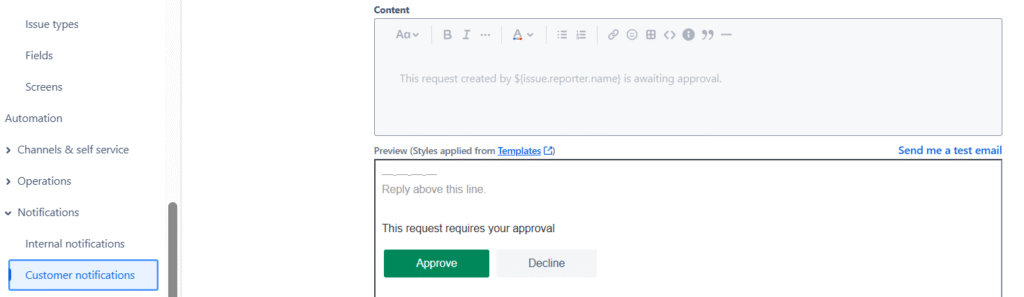
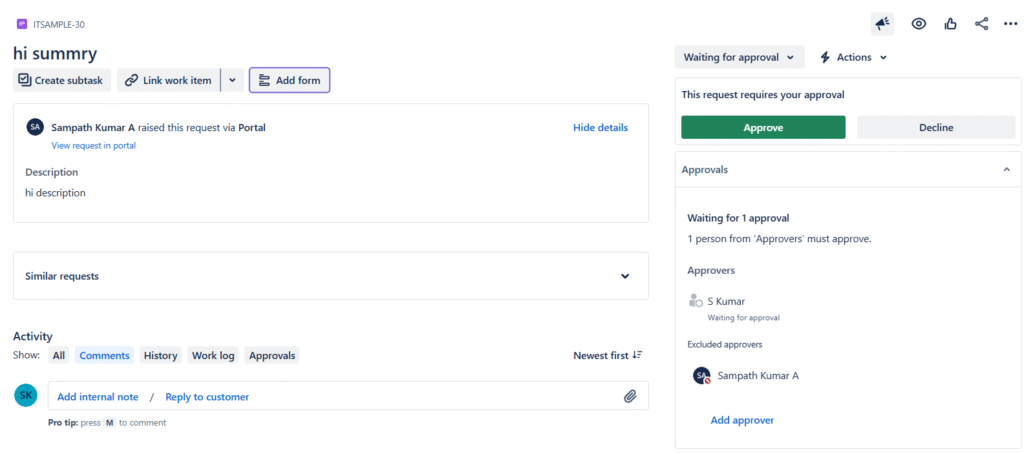
If you want to include a template for the description of the ticket, using automation would be one idea, but can be used for the tickets created manually by the agents. However, if you want to use a template for the user, an external form can be used with a preset input that is linked to the description field. Regarding approvals, it can be done by using the notification email as shown below or on the ticket by clicking on the Approve button.
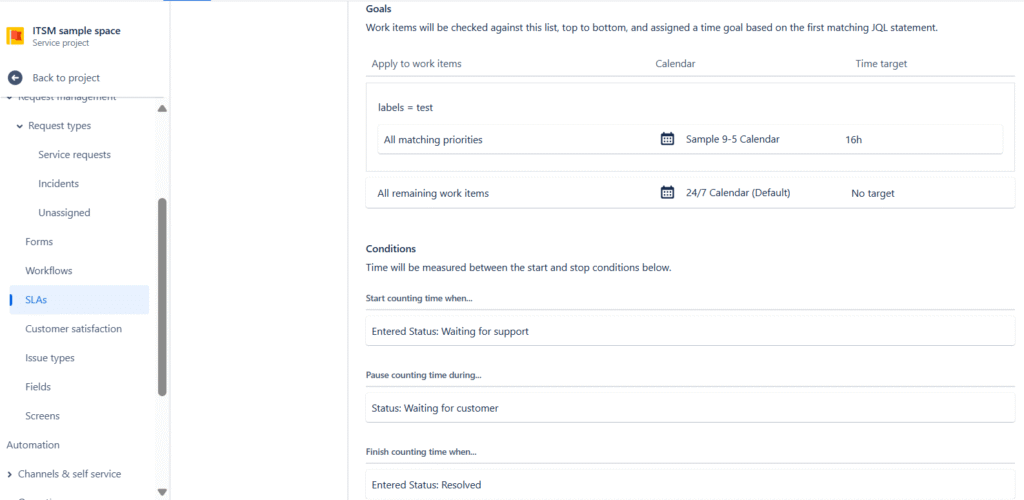
SLA Rule Setup
Now that we are ready with the updated workflow and a form that is using the updated workflow, the next step would be to use the SLA feature on the tickets. The SLA rule can be set by navigating to the Project settings > SLA section. The Goals and Conditions need to be set appropriately.
Our final form will appear as follows. The user can access this form to enter the necessary information.
Further Reading :


Leave a Reply