Git is a distributed version control system that tracks the changes that we make to the code. It let’s us to revert back to the older version in case of need. Git is particularly useful when you and a group of people are all making changes to the same files at the same time. GitHub is a cloud-based platform where using a repository, you can store, share, and work together with others to write code. In other words, GitHub is a hub or a space to store git repositories(repos). GitLab and Bitbucket are the other popular cloud-based platforms for git repositories.
When you upload files to GitHub, you’ll store them in a “Git repository.” This means that when you make changes (or “commits”) to your files in GitHub, Git will automatically start to track and manage your changes. There are plenty of Git-related actions that you can complete on GitHub directly in your browser, such as creating a Git repository, creating branches, and uploading and editing files.
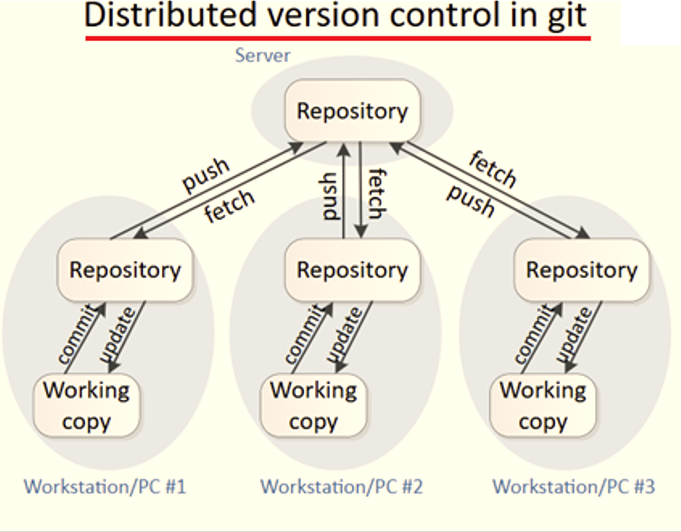
Once you start to collaborate with others and all need to work on the same repository at the same time, you’ll continually:
- Pull/fetch all the latest changes made by your collaborators from the remote repository on GitHub.
- Push back your own changes to the same remote repository on GitHub.
Git figures out how to intelligently merge this flow of changes, and GitHub helps you manage the flow through features such as “pull requests.”
Environment Setup
In the following section, you will get to see the step-by-step process of setting up VS Code and connecting to a Git repository.
Install Visual Studio Code
You can download VS Code exe file on your PC using the following link. Use the downloaded file to install VS Code.
Link: https://code.visualstudio.com/download
Install Git
Use the following link to download the latest Git file on to your PC. Once the exe file is downloaded, proceed to install task.
Link: Git – Install for Windows
Check the Git installation
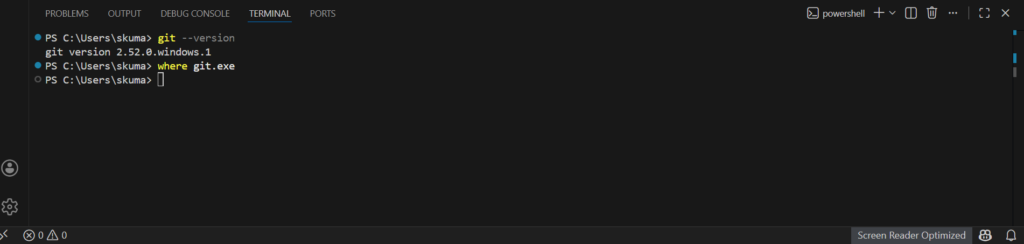
On VS Code, navigate to View > Terminal and the following window appears. Enter the following command to get the current installed version information of Git.
git --version
If you want to know the exact path of installation, you can enter the following command.
where git.exe
Create a working directory using VS Code
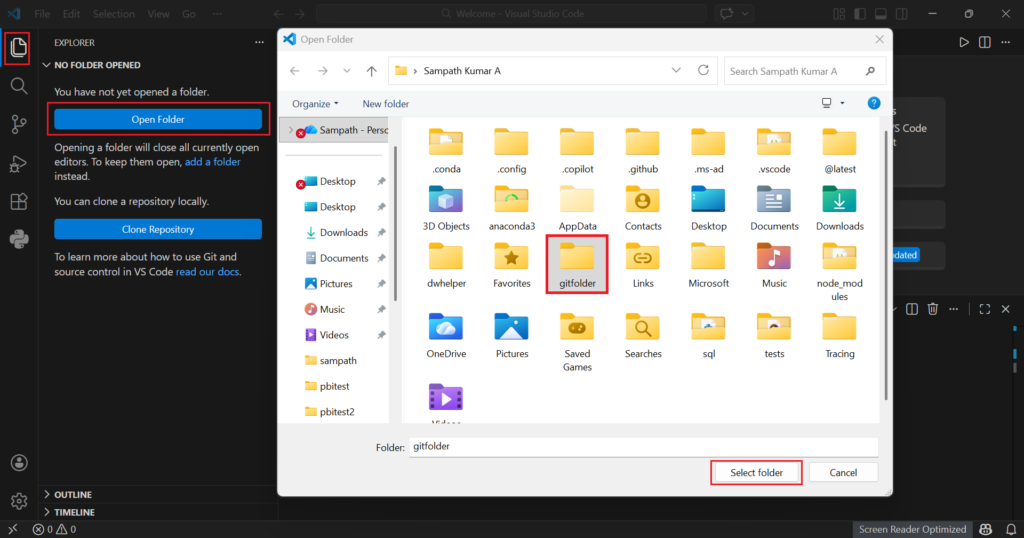
It is a good practice to maintain a separate folder for each project. To open a folder using VS Code, you can either navigate to the Explorer icon on the left and click on Open Folder or Open a folder from the File menu. Select the existing folder or create a new one and open it by clicking on the “Select folder” button as shown below. This will be your working directory for your project files.
Initialize a local Git repository
Once a new folder is open, it will not have source control enabled for the files within it. In order to enable source control features, you need to initialize a Git repository. Navigate to Source Control > Initialize Repository.
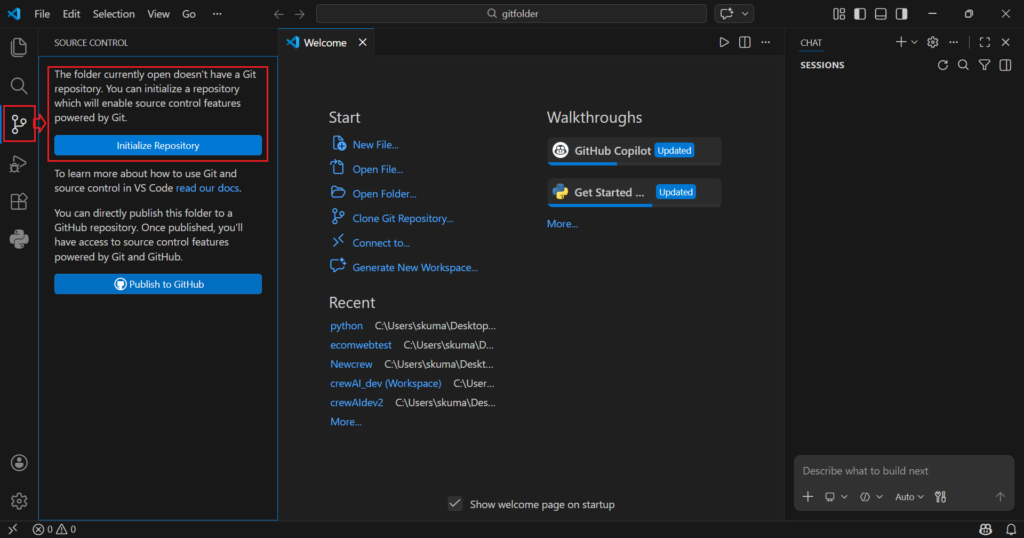
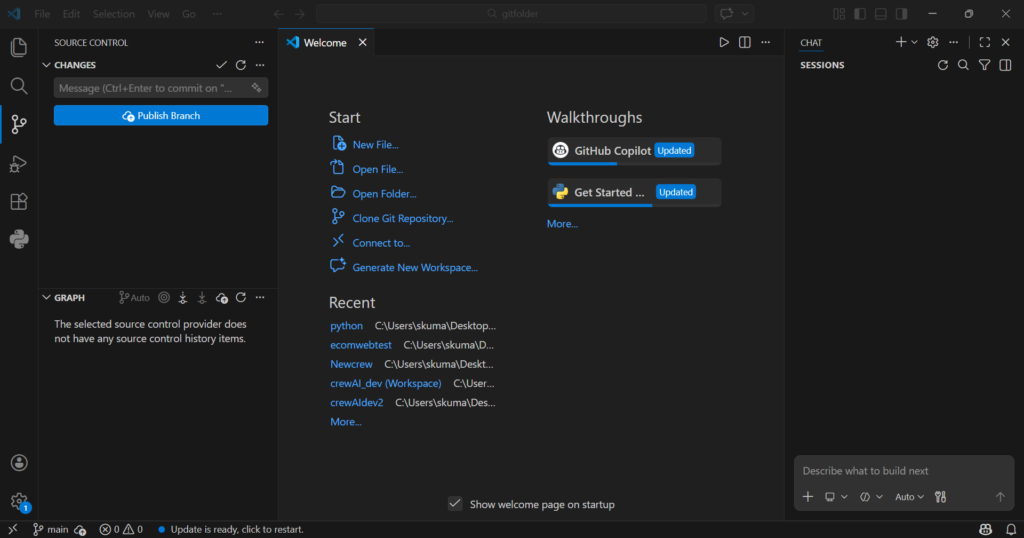
Once you click on Initialize Repository, the source control features will be enabled and the next screen will appear as follows.
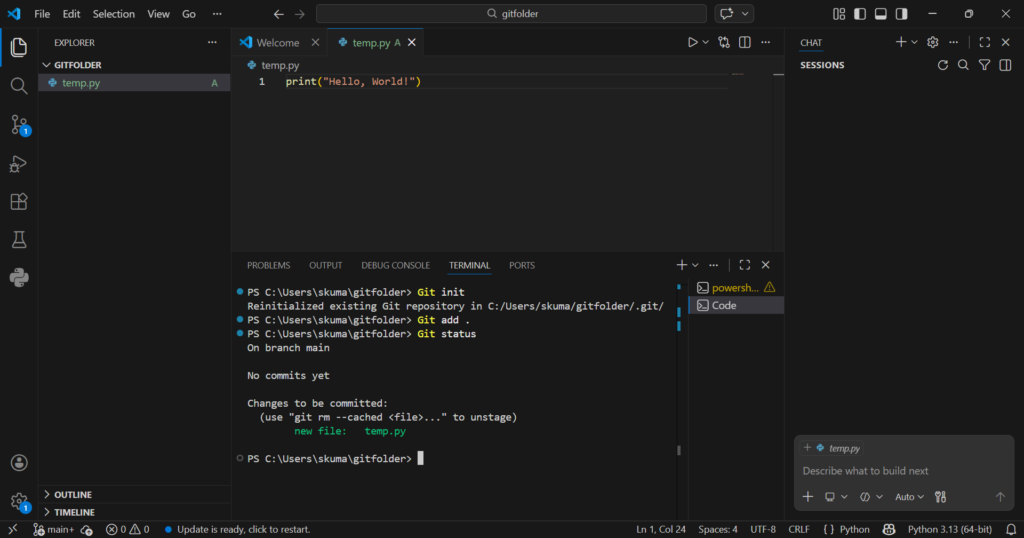
The other way of initializing a Git repository is through command. Run Git init in the directory. This creates a hidden .git subdirectory that contains all the necessary metadata and internal databases for Git to start tracking changes. In some cases, we need to reinitialize a Git repository, during which the message will show up as Reinitializing existing Git repository after the Git init command has been entered.
Staging a file
Git add command is used to place changes into the staging area (also known as the “index”), which acts as a temporary holding area for the next commit. While git add . as seen in the above screenshot means to add all changes in the current directory and its subdirectories to the staging area. We will go into the details of commit in the subsequent sections.
Git status command is used to display the current state of your working directory and staging area, showing which files are staged, modified, or untracked.
Connecting to remote repository
Now that the files are staged, next is to connect to the remote repository. The git remote add origin command is used to link a remote repository to your local Git repository. This allows you to push and pull changes between your local and remote repositories. The origin here refers to the remote repository URL. Before this, please create your account on GitHub and create a new repository.

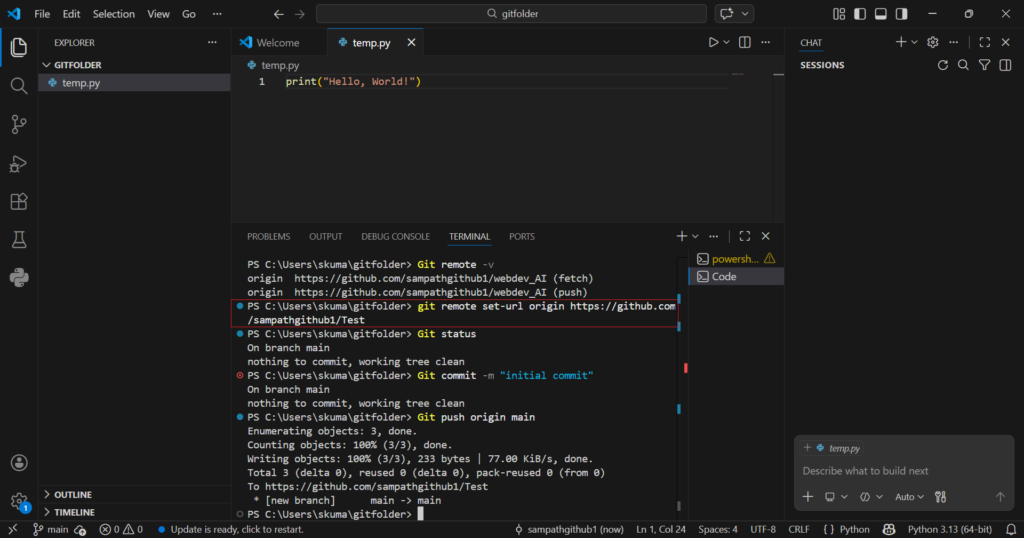
The git remote -v command is used to list existing remote repos along with their fetch and push URLs.
Committing a file
Once the file/s are staged, the next step would be to commit the files. The commit command saves a snapshot of your staged changes to the local repository. Committed snapshots can be thought of as “safe” versions of a project.
The git commit -m "initial commit" is the most common way to commit ,i.e, with a message. This saves staged changes and allows you to include a descriptive message directly in the command line.
Changing your remote repository
If you are in one repository and want to change to another remote repository, you can specify the below command. The same is highlighted in red frame in the above screenshot.
git remote set-url origin https://github.com/sampathgithub1/Test
In the above command, you are specifying the destination remote repository that you want to make use of. Create the “Test” remote repository manually on GitHub using the GUI.
Uploading to remote repository
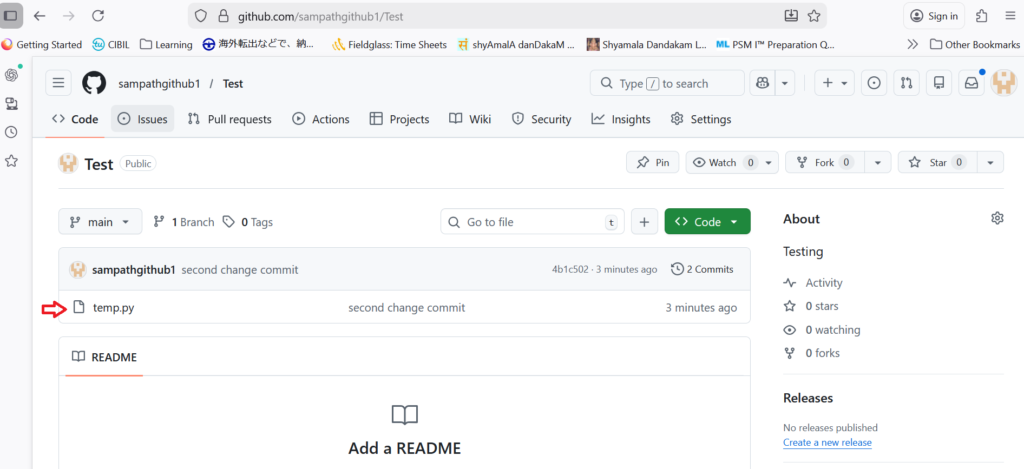
git push <remote> <branch name> command takes in two arguments. In the above screenshot, you can find the git push origin main command that refers to pushing your local main branch changes to your online repository (origin, an alias). Your remote Git repository will appear as follows on Github after uploading is complete. Login to your Github account using the URL Link and navigate to your repository.
In case you make changes to the source file, you need to perform a commit again using the following command.
Git commit -m "second change commit"
This should be followed by the git push command again. In the above screenshot you can observe the “second change commit” text mentioned next to the source file.
Further Reading:


Leave a Reply